Tips and Tricks
There are tips and tricks in a variety of other builder's web pages and below are links to some I've used often:
David Kissick: http://cozyserenity.weebly.com/tips-and-tricks.html
and Bernard Siu: http://www.cozy.simpex.com look on the left side near the bottom of the site outline (after Ch 26)
and Wayne Hicks: http://www.ez.org/pages/waynehicks/chapter_tips.htm
Building in your Garage:
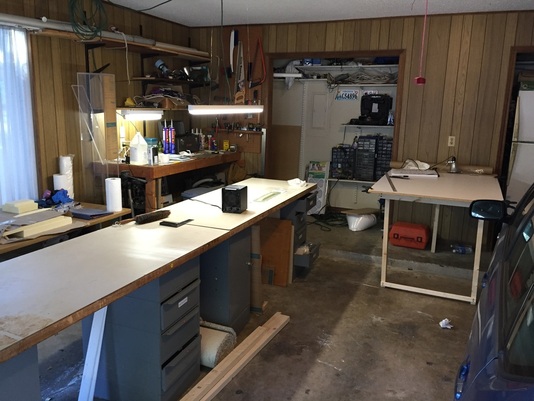
The following are some approaches I used to organizing my limited space (building in 1/2 of a 2 car garage). The best decision (in hindsight) for me was leveraging two 6 ft workbench tops and file cabinet bottoms, discarded from a renovation in town. My original plan was to re-configure them as needed growing from the individual bulkheads to fuselage, canard, spar, and wings. When I only needed 6' of top, I'd stack the wooden surfaces on top of each other and put all 4 of the file cabinet supports under. When I needed 12 feet I'd split them out and give each top 2 file cabinets. Leveling would be done with shims as needed between the file cabinets and the bench tops. Here's a picture of the bench tops end to end in the garage. The glass cutting table is to the right (near the car I'm sharing space with). Warning: My moveable bench tops are only 2.5 ft wide (too narrow for building the wings, and marginal for doing the floor of the fuselage). I was planning to use a sheet of 3/4" plywood cut to 3.5 ft width and screwed on top, just for these special wide Cozy pieces and then go back to the narrow base bench top most of the time. Because I later bought the wings in their basic layup shape, I've been fortunate not to need the full width table recommended for the Cozy. If you are building everything, I recommend building the Plans Table with some upgrades as discussed by other builders.
How I started in my garage (building practice pieces and bulkheads)
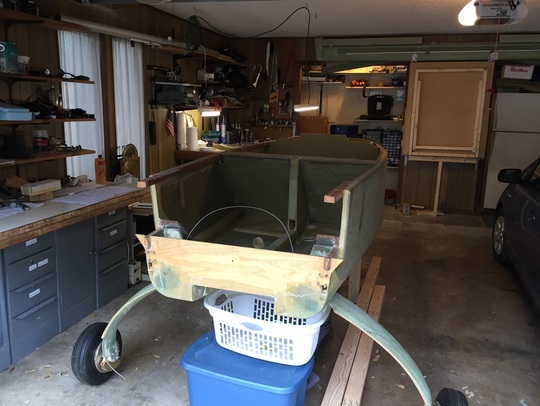
When I purchased a project that had the fuselage, spar, and canard already started, I then had to re-configure to open this space for the fuselage and store the extra pieces where I could still have room to work. Here's a picture a couple of months later with the fuselage where the workbenches were, and I squeezed the workbenches on a wall under some shelves to the left. At this stage I've finished the fiberglass storage box and the cutting table is filed up on the right. Also, the spar and canard are stored above the cutting table on a pair of very strong angle brackets near the roof which I padded with old T-shirts. Note that the tips of the angle brackets had to be bent up to create a lip to keep the canard from sliding off (it's tilted back about 5 degrees against the spar behind it).
Making space for fuselage and building the folding cutting table into the back wall (below canard and spar)
 The fuselage as long table...
Since filling the garage with aircraft and components I move the cabinets/table top around for different jobs (see Ch 12 configuration for working on canard and installing elevators). I'll have to do something drastic when I work on the wings (probably temporarily use my Wife's side of the garage. Sometimes you use any horizontal surface you can. Improv is often the order of the day, and I've seen this kind of dual use with other builders as well...
Peel Ply Use:
This isn't my tip, it's important and asked by all new builders, so I'm repeating it here: The question is how long you can wait after removing Peel Ply, before bonding to the surface without sanding:
Peel ply does two things - first, it creates a texture for a mechanical bond of a secondary layup. Second, the act of removing the peel ply breaks long chain molecules in the epoxy top surface and creates a high energy surface to which subsequent epoxy application will not only mechanically bond, but also chemically bond to the free ends of the molecules.
HOWEVER, this will only happen within a relatively short time period after the removal of the peel ply - if the molecules are exposed to O2 for any length of time, they'll oxidize and the chemical bonding will be minimal.
Sanding of the surface in close proximity in time to the subsequent bonding (after cleaning, of course) will also break the surface molecules and give some chemical as well as mechanical bonding.
So the question becomes, how long is too long to wait. I've heard some folks say that you need to get the secondary bond in place within 2 hours of the PP removal, but IIRC, Scaled (and other companies/folks I've worked with) say up to 12 hours (although always, the attempt is made to minimize the time).
So the original statement is correct - IF the PP was removed many hours/days before the next layup, then it's good practice to scuff sand the surface and clean it prior to subsequent bonding. But if you wait until just before the next layup to remove the PP, then you don't need to sand.
Hope this helps. Marc J. Zeitlin
Fish: I find the peel plied surfaces are very easy to sand, so I always give them a little scuff before bonding something on top. and I don't sand peel plied surfaces until I'm ready to do something to them. Also note that there are ample conditions where it's hard to leave the peel ply on a long time. One is when you need to do some bonding near the edges of something that's peel plied, so you remove all the peel ply.
later: I've gotten better later in the build at lifting and trimming peel ply on edges where I need to work, while leaving it on in large spaces like the strake skins to enable it to keep the under surface clean. A good example is protecting from over-spray of adjacent parts. Bottom line: don't get too worried if you have removed peel ply for a long time: just plan to do some light sanding of the surface when ready to bond to it again.
Tools:
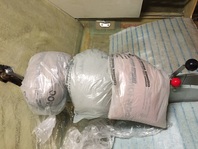 Sandbags weighting down console cap layup:
I use a Rockwell Blade Runner for all kinds of cutting purposes. It's essentially a powerful hand jig saw mounted in a table so you can feed material and switch blades rapidly. I don't have room for a band saw and this portable rig gets stored on the wall bracket when I'm not using it. I've cut up to 2" foam with it (with the guard removed it can handle larger work pieces), and plywood and fiberglass (with the abrasive blade) and even aluminum less than 1/4". There's now a newer X2 version: Rockwell-Blade-Runner-X2-Portable-Tabletop-Saw
that's of course a little cheaper.
I cut most of the aluminum on a band saw I have access to at work. I use a standard dual speed 3/8" battery powered hand drill and corded Dremmel multi-tool (also referred to as the Fine Tool), and a Dremel high speed "Dremel Tool". Make sure any of your battery powered tools have a spare battery and charge the "down" one immediately when you remove it so you always have a fresh battery. The Dremel Drill Tool I use is an 8220 which I like because it's battery powered, and comes with 2 batteries and charger, so I always have it ready to go. Useful attachments I've found are: the right angle head (for getting into spaces too tight for either this tool or my hand drill), cutting wheels, cylindrical, conical, and ball shaped grinders (these are steel and work well with both fiberglass and foam and in a pinch, aluminum. I've used it quite a bit for composites work (trimming, shaping, routing joggles,...
Getting fiberglass to behave around corners and to bond well on surfaces is assisted by having some pressure. Most of the time, you want to use gravity to help you with this (i.e. lay the glass on top of what you want to bond to so it's weight will keep it in place while the epoxy cures. There are many situations where this is not sufficient, such as bending around filet edges where one or more of the sides is not horizontal. I use a lot of small weights and even made some sand bags with 3 or more newspaper plastic bags to help me get pressure on the layup during the cure. I've not put pictures here, since there are a number of examples shown throughout this site. Clamps, and flat boards with weights on top are all great options available for different geometries. And even building a sealable plastic bag with pallet wrap and applying a vacuum is valuable in some cases (See Cozy Girrls tips for more on this). My point here is that a little thought on how you might keep the layup under some pressure during the cure BEFORE you mix the epoxy can save you from struggles or scrap with complex geometries. I've even used wedges (I keep a couple of packages of carpenters wood shims and have used them in many interesting ways, see Ch 18 Part III where I used wedges to press/flox the Clark foam flush with back of spar). I don't use very fast epoxy systems (MGS 287 and 335 are typical for me and only use 50/50 fast/slow when temperatures are below 80 degree's). This gives me plenty of time to get what ever the layup pressure configuration is going to be in place. Note that this phase can take some time as well. I've often spent an extra 15-30 minutes after peel ply insuring that the layup is set up with weights or vacuum or what ever, before starting to clean up. Remember to use pallet wrap between the work and any metal or wood pressure devices to prevent sticking. I love the plastic sand bags because I can put them directly on peel ply (or even without peel ply, but rare) and still be able to peel them off later. I actually enjoy the art of figuring out how to get a layup well pressurized as it can lead to some crazy looking temporary "what the hell is that?" moments with my family.
Digital Level: No reason to use a bubble level when building an aircraft any more. Digital is they way to go. I have a long bubble level that I put the digital level on top of for some jobs.
Laser alignment: I use a self leveling laser on a tripod for all major alignment jobs, particularly helpful for me in setting up the 17.4" waterline and getting all the lifting surfaces aligned to this reference. It's also great getting vertical centerline alignments for the fuselage. Very quick and repeatable.
Spare Hands = Help:
It's remarkable how much you can do on the Cozy all by yourself. Which is good, because most people will be amazed and entertained for the first hour of your talking about it. Then they want to get on with THEIR interests. There are some things you just have to have some help on, and ideal partners are fellow builders. I've been fortunate that Ben Bennett lives only about 30-40 minutes away and shares his time with me. I've also been fortunate that my sons can help when I really need it. They played a critical roll in large layups like the turtle back, and had I done the wing skins, I'd have wanted their help there too. Occasionally, as you get past Ch 7 you will need to turn the fuselage over or mount large pieces like spar, canard, wings, turtle back/canopy and such. I really want to thank my boys for helping me in these cases. Most of the time if a layup was not involved, it was 5-10 minutes of assistance. I've got a picture sequence below of us flipping the fuselage right side up after working on the bottom in my garage and this was complicated somewhat by having the landing gear on (so we're not working with a table here). THANKS Boys! I could not have progressed nearly as well without your help when I needed the muscle. The aircraft is not that heavy, but it does help your confidence to have plenty of hands on it when it's not on it's gear or on the table.
Carving foam for Flox Corners
|
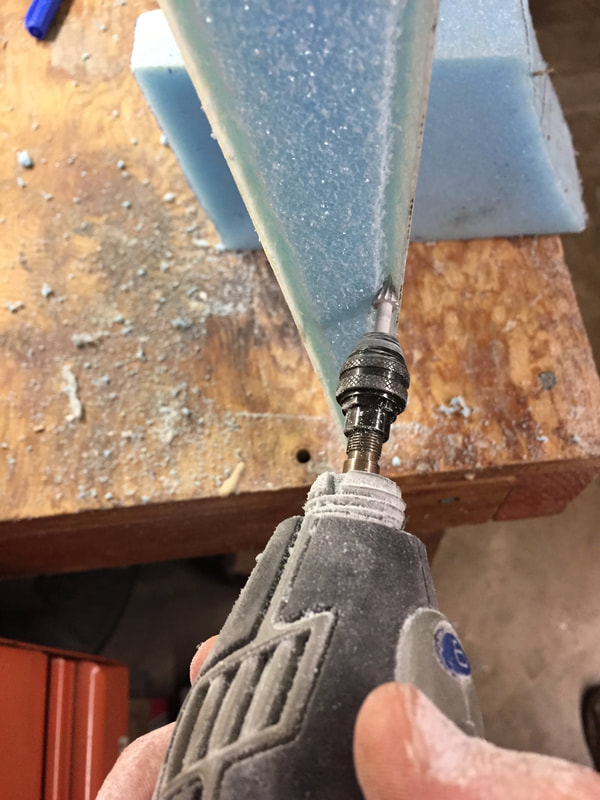
You learn to make flox corners in Ch 3 and it's a means of achieving strong 90 degree corners with foam on the interior. The basic method involves laying up one side of the corner using normal: a) micro the foam then b) glass the surface. This is then later trimmed either using the knife trim method when the epoxy is partially cured, or using a cutting tool like a Dremel with cutting wheel after it's fully cured. At this point you need to go in and cut a triangle of foam out in the corner where the two glass edges will touch, so that when you fill this corner with flox, you get a very strong glass to flox to glass interface at the corner. This prevents delimitation of either glass face at the corner. For a while I used a sharp knife to cut the corner foam out, but found that I needed to use sand paper or something to grind down the micro that was left on the face of the glass where it had interfaced with the foam in this corner. I then started using a Dremel (or equivalent) tool with a conical cutting tool as shown below to both cut the corner foam out, and grind off the micro in the original glass layer. It was much faster, and made for a very consistent corner wedge removal, while allowing good micro removal and allowing the flox to make a good bond with the original glass.
This method requires a delicate touch with the Dremel not to grind into the original glass (to the right in this figure). It's not hard, but you do need to be careful. |
|