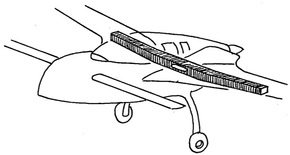
Chapter 14: Main Spar
David Pierce build my main spar, and most of my work involved inspecting, finish sanding, and fixing one spot which I describe below. This important piece will get a lot more attention once it's time to fit it in the fuselage/firewall and again when building the strakes. I'm putting this off as long as possible since the project will take the whole garage at that point, and my wife will not be as happy keeping her car outside...
July 2016 I'm starting Ch 21 Strakes and MUST now get the spar attached to the fuselage. This means returning to Ch 14 to complete the lower engine mount reinforcements and actually attach the spar (see below starting at Step 10). Then on to Ch 18 Part III page (see Steps 8 and 9 there) to complete the upper engine mount reinforcements. Then on to Ch 21 Strakes... |
|
|
Preparation for Wing Alignment/Attachment to Spar:
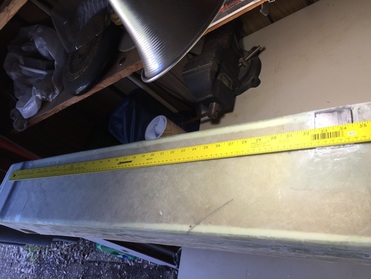
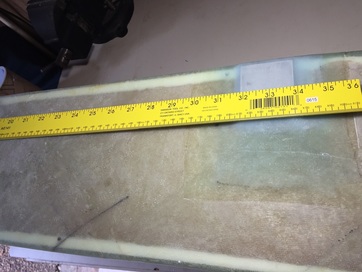
I started by returning to Ch 14 and inspecting the spar according to the plans measurements. Everything checked out well accept the Port side inboard hard point location. This hard point had been glassed in 1/2" to far inboard to have the bushing that will eventually guide the bolt for the wing to be centered in the hard point. I triple checked all the hard points and also their partners on the wings (which are wrapped carefully and stored in a good hanging position under my house) and confirmed that it was just this hard point. I then cut through the flox corner and 3 UNI plies holding it on and was able to get a sharp edge under the aluminum piece and pop it off. I sanded everything flat and roughed the surface in prep for re-floxing without cutting into the UNI plies that were bonded to the spar box because I didn't want to damage any of these layups. I then re floxed the alumni hard point in the correct position (1/2" more outboard from original position) and applied the 3 UNI plies again per plans, as shown in photos to the right. |
Original Port Inboard Hardpoint location after cutting off the 3 UNI plies on top of it.
Hardpoint glassed in correct position
|
|
Step 10: Attaching Spar to Fuselage:
This didn't start until I started work on Ch 21: Strakes because I needed to keep the workspace small to fit on "my side" of the garage. The only thing I needed to return to this chapter for was the last Step 10 Installing section. Before actually installing the spar, the lower interior engine mount hard points had to be glassed in (since they will be difficult to reach once the spar is permanently attached. I followed the plans accept that I used 2" square Al pieces. I put some clamping force with a lever as shown in the figure to squeeze the block well against the firewall for cure (with a little piece of plastic wrap to keep the board from sticking to the layup). Next was sliding the spar in between the longerons and getting the alignment set. I'd done this a long time before putting the turtleback on and leveled the the spar in all directions with longerons and getting the yaw set by measuring the distance from spar tip to F 28 centerline (easier to reference than the tip of the nose). I marked the spar where I positioned the digital level for both pitch and roll measurement when the longerons were level and used these same points and verified readings being same. Note very important: I used these same roll and pitch digital measurements on the same spots on the spar when I was aligning the wings with the spar on the ground in Ch 19. Now it was time to really get the spar locked on. First get the longerons level in both roll and pitch and do a good dry fit to check the spar roll and pitch angles per the recorded values marked on the spar last year and noted in the wing alignment activity of Ch 19. At this point I realized that the spar needed to be moved 0.25" more forward to provide the room to install the two side firewall pieces and Clark foam (things I wasn't paying attention to over a year ago when I did the first alignment fitting). No problem. I just marked how much fuselage side needed to be removed and used the multi-tool to file it out. I then micro/2BID'd the exposed foam and continued the dry fit process to verify I still had all my good roll and pitch angles with the longerons. I also checked again the yaw angle as directed by the plans by measuring spar tip to F-28 centerline mark and it was within 0.2" on both sides out of 122" overall measurement. Note that I had marked the spar and firewall centerlines in the original alignment last year when doing all this so getting the alignment was very easy this time. I left it overnight and checked it again the next morning: still good, so mixed up the flox and applied liberally on longerons and spar and fuselage sides where I'd recently had to do the shaping and wet fit the spar. I had to do a single small shim on the aft side of the left lower longeron to get all the angles to match up. Leave it to cure. Return next day: measurements all still right on!! Now I can start layups... First was the dreaded 3 layups that go from inside to outside the firewall/spar slits upper and lower. I sanded all the areas, whether they were peel plied or not, then pre wet these 2 BID sets, and put them in starting with the harder bottom ones. It's a really cramped space back there, but be patient. Having the tapes on the plastic pallet wrap backing was critical to keeping it from sticking to things I didn't want it to stick to. Once in place, I peeled off the thin plastic and smoothed the layup by hand (with gloves). I measured carefully and made the tapes with about 1/2" shorter than the distance between the aileron bearings in the firewall. This gave me 1/4" room on each side to keep from getting epoxy on those bearings. Then came all the relatively easy 5 BID layups connecting the spar to the upper and lower longerons inside and out. The lower inside ones are not easy from the cramped space, but the same technique described above works fine. It helps if it's not the middle of the Summer in Texas. Dripping sweat was more of a factor than dripping epoxy. Using a fan blowing on me where ever I was, helped a ton in the 94-98 in shade temps. This is 100% slow hardener time if ever there was one. I never had trouble with pot life. With a solid spar to longeron bond, it was time to move to Ch 18 Step 8-9 to finish the firewall and up the upper engine mount reinforcements. |
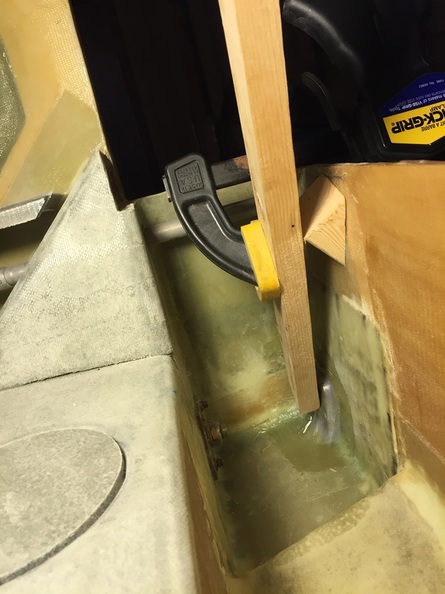
Lower Rt engine mount inner hard point being pressed into firewall during cure.
|