Fish's Cozy MKIV
  • Welcome
  • Preparation, Visits, Tips
    • Preparation
    • Visits
    • Tips and Tricks
    • Special Cases - Interesting Fixes
  • Chapters 3-15
    • Ch 3 Practice
    • Ch 4-7 Fuselage, Main Gear
    • Ch 8 Head Rest, Heat Duct, Seat Belts
    • Ch 9 Main Landing Gear
    • Ch 10-12 Canard & Elevators
    • Ch 13 Nose >
      • Ch 13.1 Nose gear, Brakes, Landing Light and Skid Plate
      • Ch 13.2 Nose Top & Canard Cover
      • Ch 13.3 Relevant Later Work
    • Ch 14 Spar
    • Ch 15 Firewall
  • Chapters 16-25
    • Ch 16 Controls
    • Ch 17 Trim
    • Ch 18 Turtleback/Canopy >
      • Ch 18.1 Turtleback
      • Ch 18.2 Canopy
      • Ch 18.3: Latch, IP Cover, Misc
      • Ch 18.4 Lift and Locking Canopy (Version 1)
      • Ch 18.5 Electric Lift Canopy (Version 2)
      • Ch 18.6 NACA's for Engine Cooling
    • Ch 19 Wings
    • Ch 20: Winglets/Rudders >
      • Ch 20.1 Winglet Fabrication
      • Ch 20.2 Winglet Attachment
      • Ch 20.3: Rudder Fabrication
    • Ch 21 Strakes >
      • Ch 21.1 Strakes: Through "Top Hats"
      • Ch 21.2 Strakes: Bottom Skin through Prep for Top Skin Final Bonding
      • Ch 21.3 Strakes: Top Skin Final Bond through Fuel Tank Seal
      • Ch 21.4 Strakes: Misc Completion of Strakes
      • Ch 21.5: Strakes: Wing/Strake Fit Check
      • Ch 21.6: Strakes: Post Cure Tanks
    • Ch 22: Electrical >
      • Ch 22.1: Electrical: Inst Panel
      • Ch 22.2: Electrical: Firewall
      • Ch 22.3: Electrical: Warning Lights
      • Ch 22.4: Phase I Testing
    • Ch 23 Engine and Cowling >
      • Ch 23.1 Firewall and Mount
      • Ch 23.2: UL 520is Initial Integration
      • Ch 23.3 Cowling
      • Ch 23.4 UL 520is First Start
    • Ch 24: Seats, Armrests, Fairings >
      • Ch 24.1: Fairings
    • Ch 25: Finishing >
      • Ch 25.1 Canard
      • Ch 25.2 Interior
      • Ch 25.3 Fuselage/Strakes Bottom
      • Ch 25.4 Fuselage/Strakes/Canopy Top
      • Ch 25.5 Wings
      • Ch 25.6 Assembly in Primer and W&B 1
  • Ch 26: Hangar
    • Ch 26.1 Assembly and Fitting
    • Ch 26.2 More Punch List Stuff
    • Ch 26.3 Inspections
  • Ch 27: Ground Tests, First Flight and Ph I Testing
    • Ch 27.1: More Ph I Testing Stuff
  • Ch 28: Post Phase I Improvements
  • Ch 28.1: More Improvements
  • Ch 29: IFR

Chapter 8:  Head Rest, Heat Duct, Seat Belts

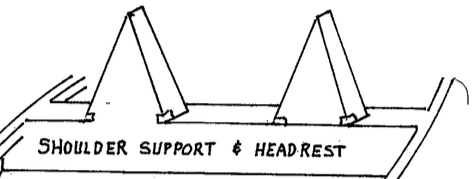
I didn't start building the head rests until I'd moved to the hangar.  I didn't want these components in the way of moving around the vehicle with the canopy off, and they are not needed to do anything else in my design.  Note that I mounted both of the headrests to the canopy bulkhead.  Other Cozy builders have done this as well.  They are not strong enough to provide roll-over protection, so I felt they should be kept out of the way when the canopy is lifted.

Pictures of the headrests are seen in the Hangar Section of this site.

​The portion of the heat duct that's between the front and back seats was built as part of the base structure.  I extended the heat duct around the nose wheel well to the feet (see picture in Step 8 portion of this link), and also set a gate valve in the firewall, following Andrew Anunson's method.  I've not yet connected the hot air to the gate valve behind the firewall, or the gate valve to the console heat duct, and probably won't until after Phase I testing, since I don't need it yet.  But all the infrastructure is there when ready.

​

I bought seat belts from Aircraft Spruce per the ACS recommendations.  They are fine but I didn't install them until after I moved to hangar.  I recommend not even buying them until you get ready at the airport.  They just sat in storage for several years at my house and tied up that $.  Plus I got smarter along the way and might have chosen a different seat belt by the time I actually needed them.
Picture


Proudly powered by Weebly