Chapter 22: Electrical: Firewall
Firewall: Cockpit Side Near Completion
|
I posted some of the initial layout of the firewall in the Ch 22 Electrical Planning page, and here I'm really looking back on what resulted as I'd reached completion of the Dynon and UL Power components in combination with establishing a firewall ground and odds and ends. You can see from the figure on the right that it got plenty busy in the end. It's interesting because there's fewer electrical components for backbone electrical, but this has shifted in these modern systems to more complicated sensing suites and associated control boxes, with many more small wire harnesses.
I later corrected the placement of the ammeter shunt in the circuit so that it was between the battery and all the loads, as depicted in the Cozy Plans. This allows me to see net loading on the battery, which includes when it's being charged or discharged, so if the engine is running and I see a discharge, I know the alternator is not putting out enough power to handle loads (needs attention). I will replace the PC680 Battery with a PC625, which will require a new composite battery strap. 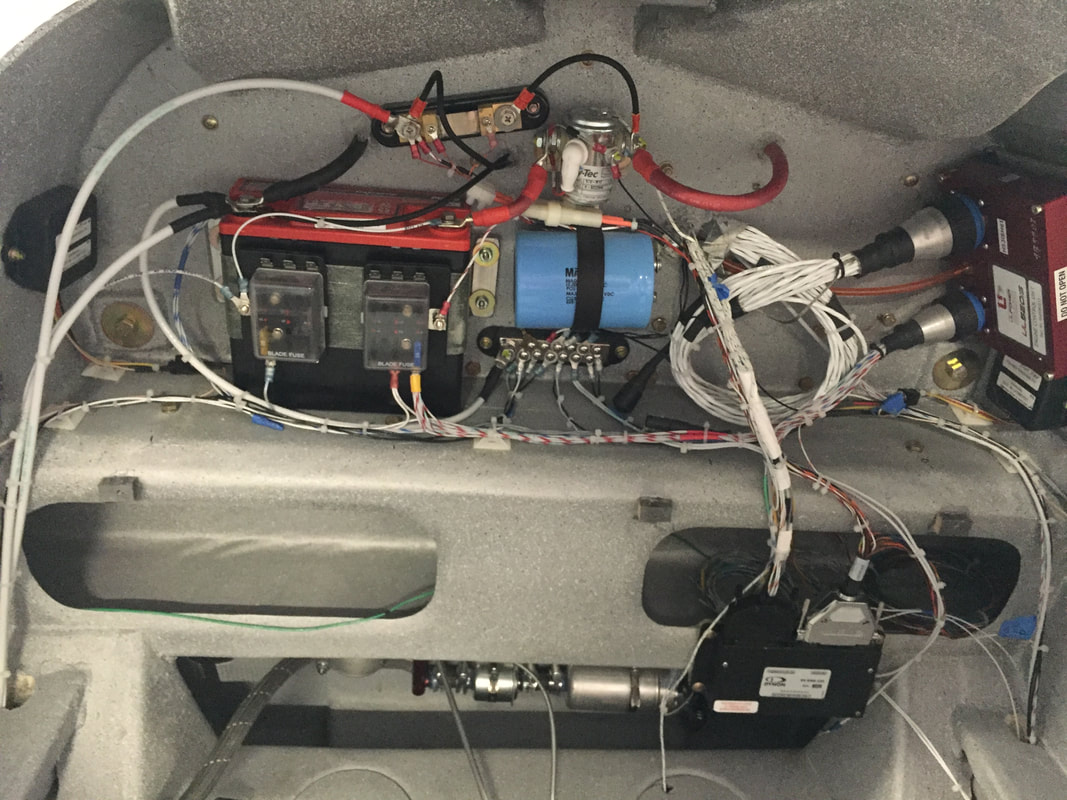
Updated firewall wiring: Notable change from previous picture is moving the hot cable (white 6AWG cable with red terminal heat shrink) from the master solenoid output to the left side of shunt.
|
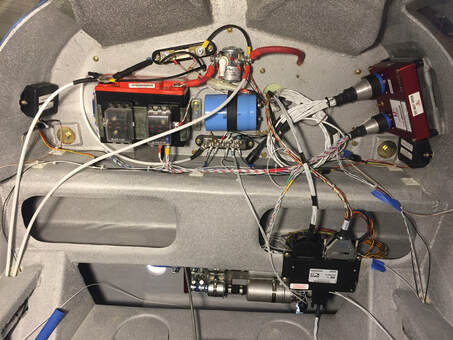
Early look of the firewall wiring: Red Box on right: UL Engine Control Unit.
Black Box lower right: Dynon Engine Management System.
Blue Bus Capacitor center.
Master Solenoid above Capacitor.
Fuse blocks on battery strap.
Ground Block below Capacitor.
6 AWG going under armrest on left are routing to VP-X at Instrument Panel and Nose Gear Power.
Small black boxes on left and right above spar = fuel level gage signal conditioning.
Ammeter shunt above battery.
Dual Fuel pumps and pre-filters below spar (not connected to blue hose from central sump yet).
|
Firewall: Engine Side Near Completion
I posted the prep work for this side with the SS sheet and fiberfrax in the Ch 22 Electrical Planning page, and here I'm posting a look at the engine side after the engine has been mounted to see a more populated back side. See captions below:
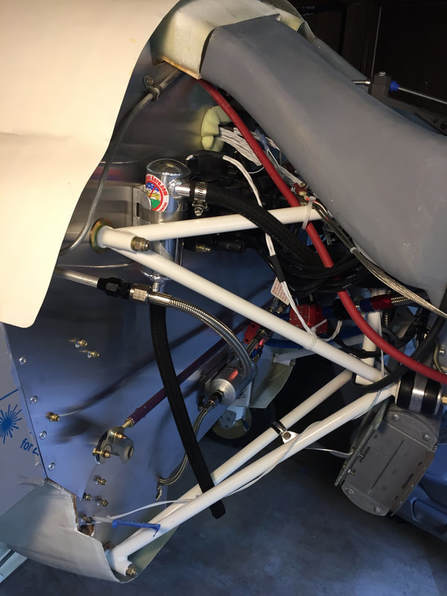
Left side: starting at top:
- red 12V starter cable
- Anti-splat air/oil separator (still needs oil return line to pan)
- Stainless Braid fuel return line to L tank
- back at top deeper: firewall pass through for all controls and instrumentation (foam is temporary stuffing, will be high temp RTV or similar in final configuration)
- really difficult to see because it's black is the 1st of 2 Electronic Ignition coil blocks mounted controls feedthrough and above the spar.
- silver can below aileron link tube is main fuel filter (UL for now)
|
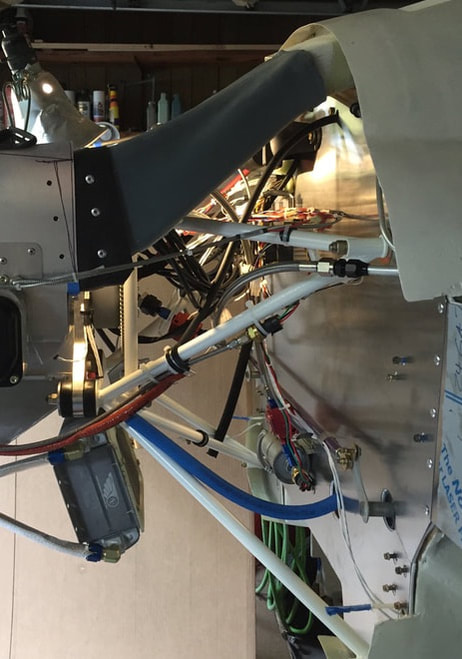
Right side: starting at top:
- black alternator rectifier (seen in earlier views of firewall before engine mounted)
- black ignition wires running from coils through the bottom of the cylinder cooling duct to spark plugs out of view
- stainless braid fuel return line to R tank
- red fuel flow cube on exit of fuel filter, it's partner is seen in the background before the T where fuel return splits to go to L and R tanks. Plan to differentiate these two sensors to get fuel consumption in addition to the fuel tank capacitance probes.
- The blue fuel hose shown is temporary, it is running through the heated air access hole in the firewall to the pre filters on the fuel pumps. I'm possibly going to use this to run engine without filling fuel tanks while at my house (only need a little fuel and considering doing these short test runs with a portable fuel tank, with recirculation also running into the portable. We'll see
- View of oil cooler is bracket mounted to engine mount.
- No rudder cable or turning blocks installed yet.
|
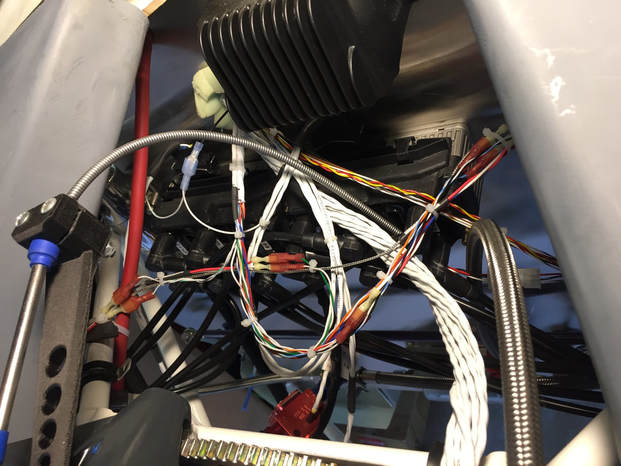
Top view between the cylinder cooling ducts and before installing the airbox/air filter for engine intake: - black Ignition coil blocks easily seen here
- Big white bundle is UL engine control harness (pre-wired with engine)
- Smaller white and colored wire bundles are instrumentation (CHT's, fuel flow's, oil and fuel pressures, oil temp)
- Throttle push/pull shown with it's custom mount to clear the airbox (not shown)
- braided steel fuel supply hose to right coming from fuel flow cube/fuel filter.
- red cube seen bottom/center is for the fuel return to tanks
NOTE that significant cleanup of this wiring with tie wraps etc occurred as the preparation for Airworthiness ensued at the hangar.