Fish's Cozy MKIV
  • Welcome
  • Preparation, Visits, Tips
    • Preparation
    • Visits
    • Tips and Tricks
    • Special Cases - Interesting Fixes
  • Chapters 3-15
    • Ch 3 Practice
    • Ch 4-7 Fuselage, Main Gear
    • Ch 8 Head Rest, Heat Duct, Seat Belts
    • Ch 9 Main Landing Gear
    • Ch 10-12 Canard & Elevators
    • Ch 13 Nose >
      • Ch 13.1 Nose gear, Brakes, Landing Light and Skid Plate
      • Ch 13.2 Nose Top & Canard Cover
      • Ch 13.3 Relevant Later Work
    • Ch 14 Spar
    • Ch 15 Firewall
  • Chapters 16-25
    • Ch 16 Controls
    • Ch 17 Trim
    • Ch 18 Turtleback/Canopy >
      • Ch 18.1 Turtleback
      • Ch 18.2 Canopy
      • Ch 18.3: Latch, IP Cover, Misc
      • Ch 18.4 Lift and Locking Canopy (Version 1)
      • Ch 18.5 Electric Lift Canopy (Version 2)
      • Ch 18.6 NACA's for Engine Cooling
    • Ch 19 Wings
    • Ch 20: Winglets/Rudders >
      • Ch 20.1 Winglet Fabrication
      • Ch 20.2 Winglet Attachment
      • Ch 20.3: Rudder Fabrication
    • Ch 21 Strakes >
      • Ch 21.1 Strakes: Through "Top Hats"
      • Ch 21.2 Strakes: Bottom Skin through Prep for Top Skin Final Bonding
      • Ch 21.3 Strakes: Top Skin Final Bond through Fuel Tank Seal
      • Ch 21.4 Strakes: Misc Completion of Strakes
      • Ch 21.5: Strakes: Wing/Strake Fit Check
      • Ch 21.6: Strakes: Post Cure Tanks
    • Ch 22: Electrical >
      • Ch 22.1: Electrical: Inst Panel
      • Ch 22.2: Electrical: Firewall
      • Ch 22.3: Electrical: Warning Lights
      • Ch 22.4: Phase I Testing
    • Ch 23 Engine and Cowling >
      • Ch 23.1 Firewall and Mount
      • Ch 23.2: UL 520is Initial Integration
      • Ch 23.3 Cowling
      • Ch 23.4 UL 520is First Start
    • Ch 24: Seats, Armrests, Fairings >
      • Ch 24.1: Fairings
    • Ch 25: Finishing >
      • Ch 25.1 Canard
      • Ch 25.2 Interior
      • Ch 25.3 Fuselage/Strakes Bottom
      • Ch 25.4 Fuselage/Strakes/Canopy Top
      • Ch 25.5 Wings
      • Ch 25.6 Assembly in Primer and W&B 1
  • Ch 26: Hangar
    • Ch 26.1 Assembly and Fitting
    • Ch 26.2 More Punch List Stuff
    • Ch 26.3 Inspections
  • Ch 27: Ground Tests, First Flight and Ph I Testing
    • Ch 27.1: More Ph I Testing Stuff
  • Ch 28: Post Phase I Improvements
  • Ch 28.1: More Improvements
  • Ch 29: IFR

Chapter 21.6: Strakes  (Post Cure Tanks)

Picture

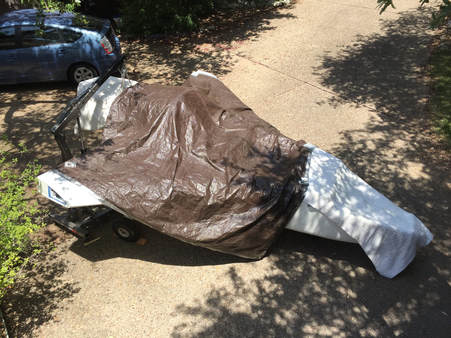
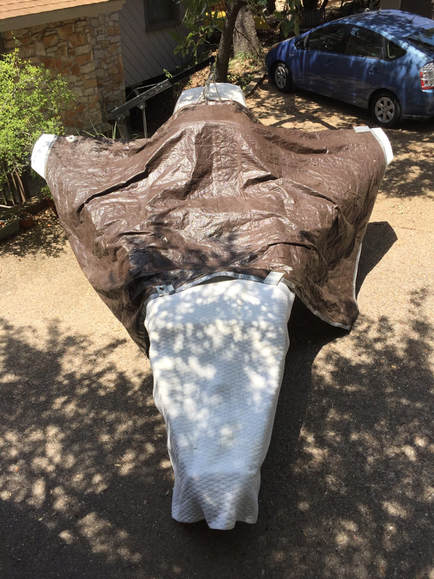
About 18 months after completing the wing/spar/strake fit check of the previous page, I'd completed the micro/finish sanding and priming of the whole plane, and we were enduring a heat wave in Austin where for over a week (not the first time) we were having 104+ weather.  I used the hottest forecast day (107F) to push the fuselage out into the driveway  and have the sun shine on it with a dark tarp over the strakes to help with solar absorption.  It was out all day with a little bit of repositioning mid day to take advantage of the shifting sun and maximize heating.  I inserted my shop remote temperature sensor into each strake tank and monitored from the comfort of the air-conditioned house.  I got over 5 hours of 138+F temperatures and likely 8 hours of at least 125F before pulling it back in the garage at as the sun got lower.  I considered this a good Post Cure following Gary Hunter's advice for EZ Poxy and fuel resistance.
Picture
Before pushing this out into the oven of a day, I removed all the avionics and batteries. Note that the temps in the tanks were at least 138F in the warmest part of the day which was about 5 hrs.
Picture
Note the engine hoist in the back. It this point in the build I had the UL520is mounted on the firewall and to insure no creep in the main gear bow, I lifted on the engine mount to take all load off the tires.

Link to Electrical Work for Ch 22

Proudly powered by Weebly