Chapter 27: Ground Testing, First Flight, and Phase I Testing
Slow Taxi Around Hangar Area:
I have a short video of this in the middle of this page, since it occurred while working through punch list of things to fix/adjust and was relevant to the brakes.
I have a short video of this in the middle of this page, since it occurred while working through punch list of things to fix/adjust and was relevant to the brakes.
Medium to High Speed Taxi on 4000 ft Runway:
- got good advice from Vance Atkinson to be very careful with these tests and "Be Prepared to Fly the Cozy if you leave the ground, because you will not likely be able to get it back down and stopped before the end of the runway".
- Approached it very slowly from 45kts (per the Cozy POH) and did 5 runs (on 5 different days) with slowly increasing speeds to ~57kts and cooler weather before I was able to pull back on stick and get the nose to come up. I don't think the mains came off, as my max airspeed from the data log was 65kts just briefly (was throttled back already). Very distinctive feel of the Cozy getting light, and I finished all this and started braking at the 1/2 way mark on the runway, and easily stopped by the end (going downhill into 5 kt wind on runway 17).
First Flight: 11/9/19:
I was really fortunate to have Vance Atkinson come conduct my first flight. He's a super experienced pilot and well known in our canard community and beyond as having spent a lot of time flight testing modifications he made to his Cozy III and helping others with learning to fly the canards. We had a beautiful clear 70F day with little to no wind and his flight was about 35 minutes, with periodic calls to Brandon Tapp and I who watched from the ground. He put N78CZ through the introductory paces with stalls and slow turn stalls and gear down stalls and some flight up to 150kts with no unusual behavior. Stall speeds were unusually low 60-62kts indicated and we'll continue to check this as flight testing progresses. He reported very good cooling both for cylinders and oil with some increase cylinder temps when holding high power at steep angles of attack (don't have the speed for this, will check) where flow is having a harder time getting into the NACA scoops on top of the Turtleback (downdraft). This temperature growth was quickly recovered by pitching over and applying a little more power to get good flow through the cooling ductwork.
We identified several things to work on prior to more flights but overall he commented to Brandon and I upon return that it was one of the best behaved Cozy's he's flown. I'm thrilled to know that N78CZ doesn't have any big problems and know I've got work to do for improving it for more Phase I. I'll get a movie posted here when I get done editing what was collected down to a reasonable size. For now here are a couple of clips from the video: THANK YOU SO MUCH VANCE!!!!
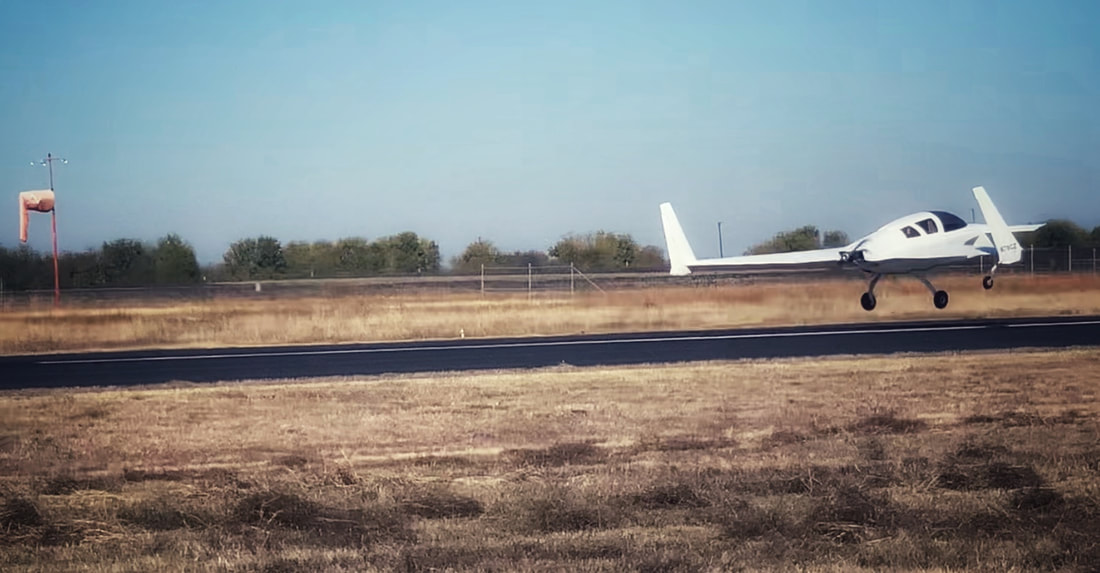
First Take-off: Woo Hoo!
|
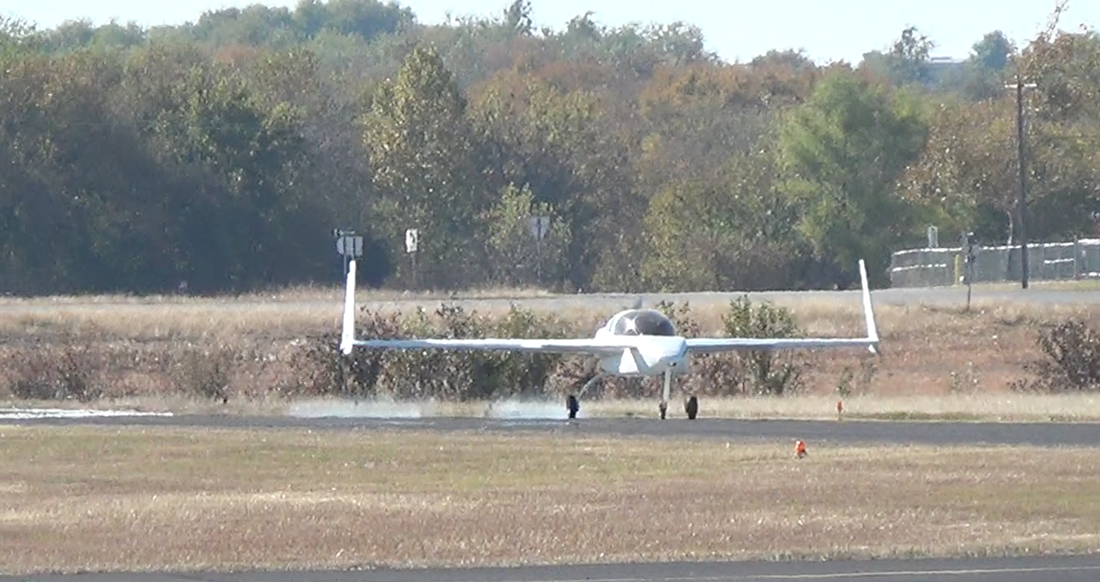
First Landing: Oh My Goodness, What a relief.
|
There are so many people to thank for their help and support to this point. I can't possibly fit them all here. I have tried to reach out to many of them, but in some cases it may take me a while. There's no question that this was a major event for me personally. One of the largest endeavors of my life (after raising kids and keeping a marriage in tact... so far). Thanks to my family for giving me the time and space and forgoing the resources necessary for this all to happen over 5 years of intense effort.
Phase I Testing:
I'm in the process of executing Phase I Testing of this Cozy within the Operating Limitations issued by the FAA with my Airworthiness Certificate. I'll provide information on things that require extra attention either here or in related build chapters. Initially, the aerodynamics of the plane at least in slow to medium speed flight are very good.
I worked on a few of issues and improvements related to the avionics and electrical system in Phase I and am documenting these in a page under Ch 22 for the Electrical system. The Autopilot installation for instance is covered on that page. Here's the link to those topic areas: Ch 22.4 Phase I Testing Issues.
|
Improving Cylinder Head Temps:
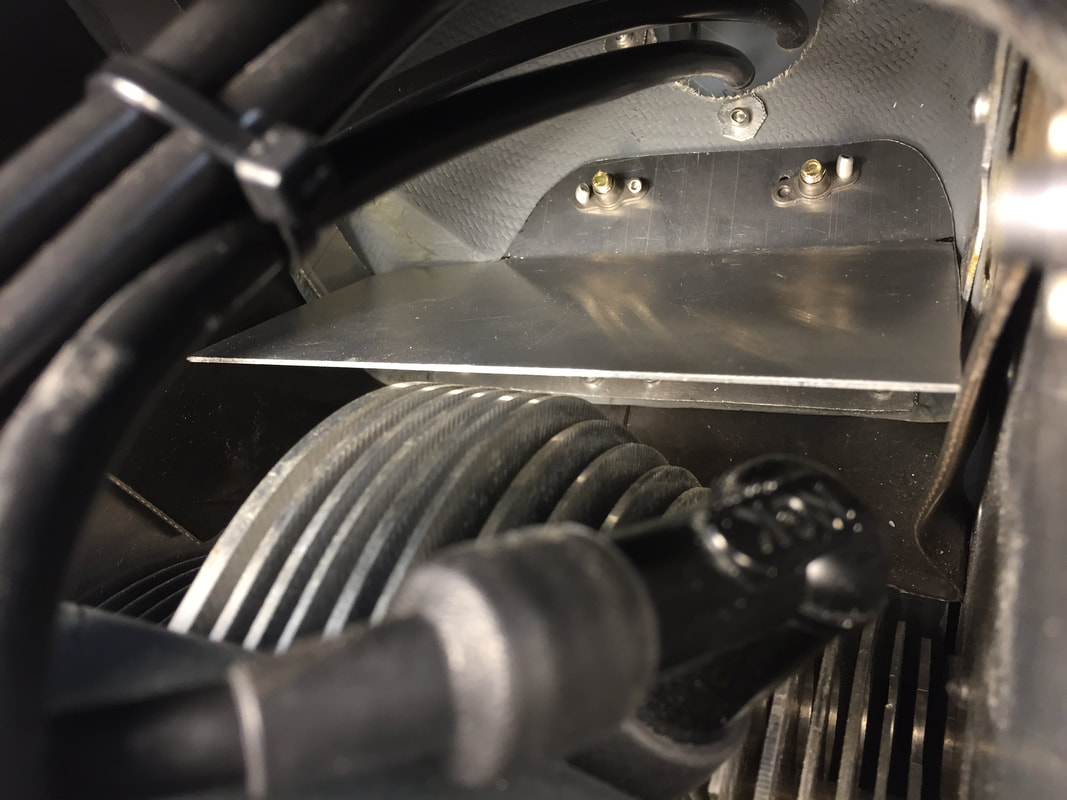
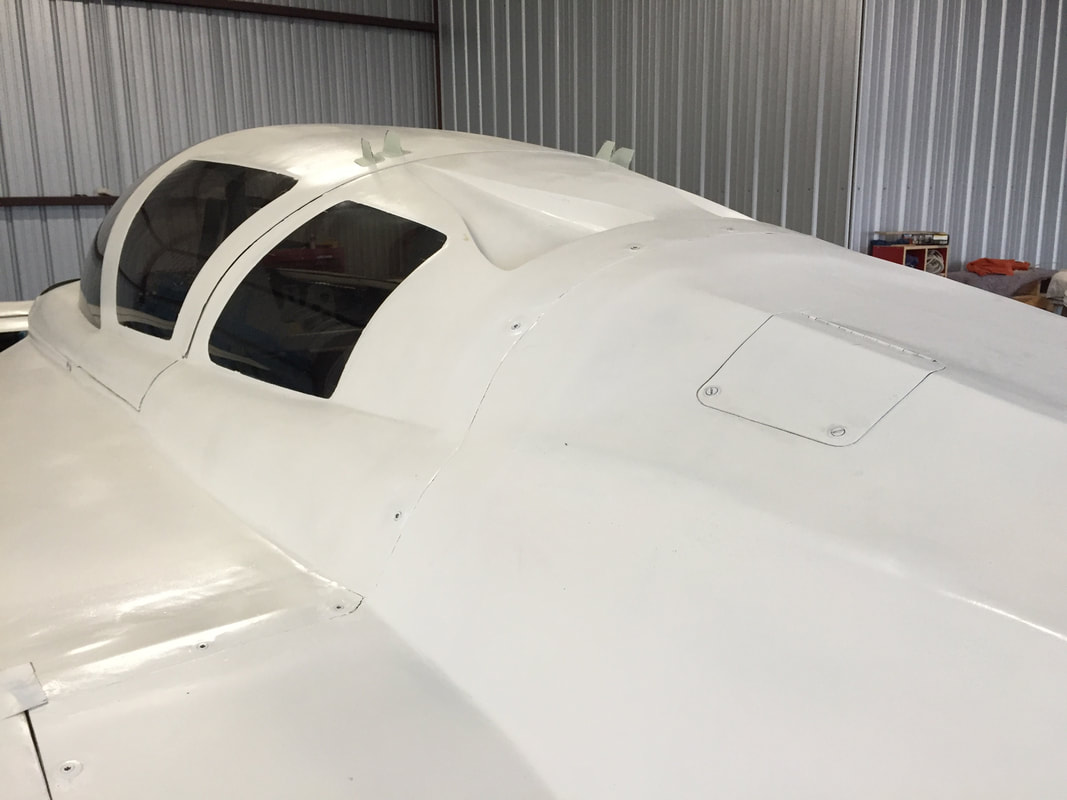
Once I was flying I could assess the distribution of temperatures across the cylinder heads under realistic flow conditions. It became quickly clear that cylinders 5 and 6 were getting too much cooling and cylinders 3 and 4 were not getting enough. Examination of the geometry of the flow duct going to each side suggested that excess flow was hitting the forward edges of 5 and 6 and flowing down, potentially robbing the other cylinders further aft of cooling potential. I built an aluminum flap for the #6 side of the engine that would divert cooling flow up in the duct just before cylinder 6 to see if this would improve the cooling distribution, and it did (had comparison with the unmodified other side). So I built same ramp for the #5 cylinder side. Cylinders are cooling more evenly (within about 35 F of each other on the same side of the engine). As I later increased flight test speeds up around 150kts, I noticed a condition where occasionally the EVEN side CHT's would climb rapidly, suggesting they were not getting good cooling flow. Initially, I pulled power back and initiated a descent to reduce heat generation and increase airflow velocity. This did not help however, and a reduction in speed was ultimately needed to re-engage cooling flow. This was only happening on the EVEN side (the co-pilot side) but I was pretty sure I was seeing flow separation on the top of the turtleback which was preventing the NACA duct from properly ingesting high velocity air. To confirm this, Jack Fleetwood (a well known aviation photographer and hangar neighbor) flew with Brandon Tapp (Cozy MKIV in Austin) to photograph my Cozy under these high speed conditions after I'd fitted lots of black yarn tufts on the TB, and cowling and winglet/wingtip areas where I wanted to assess flow quality. This was great, as we verified by observation and photographs the separation of flow over the co-pilot NACA side, flow separation in a couple of areas of my lower cowling, and good flow characteristics (no separation) in the winglet/wing intersection area. From these photos I estimated the location and orientation of vortex generators (VG's) I would use upstream of both topside NACA ducts to enhance the vertical flow into the NACA ducts using the general approach demonstrated by others, particularly the Velocity aircraft folks who have NACA cooling ducts in this upper area forward of the firewall. Follow-on testing showed significant improvement in cooling on both EVEN and ODD side CHT's, so further VG modification is not planned for now. Another adjustment I'd started just prior to the VG investigation, was getting the CHT's more even on the SAME side, as the center cylinders are consistently higher temperature than the front and rear cylinders on both sides. I followed work done by Nate Mullins with his UL520is equipped Long EZ and applied metal tape to the exposed cylinder head fins of these fwd and aft cylinders to reduce their effectiveness. This tape was only applied on the most forward and most aft fins to encourage flow through the fins of the center cylinder and fins of these fwd/aft cylinders that are adjacent to the center cylinder. The results so far have been fantastic in terms of CHT's being cooler and much more even. My #1 and #2 cylinders are still running about 20-25F cooler than the others, but I'm going to wait for warmer outside temperatures before making further modifications (it's winter and I'm flying in conditions of 45-70F outside temperatures). It's June now with ground temperatures in the high 90's and I've done several things to improve cooling distribution to cylinders: a) reduced the size of the in-duct deflectors by 45% to enable more flow back to cylinders. b) Implemented small deflectors inside the plenum top covers to increase pressure over Cylinders 3 and 4 c) used Al foil/tape over portions of the #'s 1, 2, 5 & 6 cooling fins to reduce cooling locally and improve cooling to 3 and 4. The results are I'm getting their temperatures to stay below their max continuous value of 320F, and they are generally within 8-10 degree's of each other in cruise conditions. |
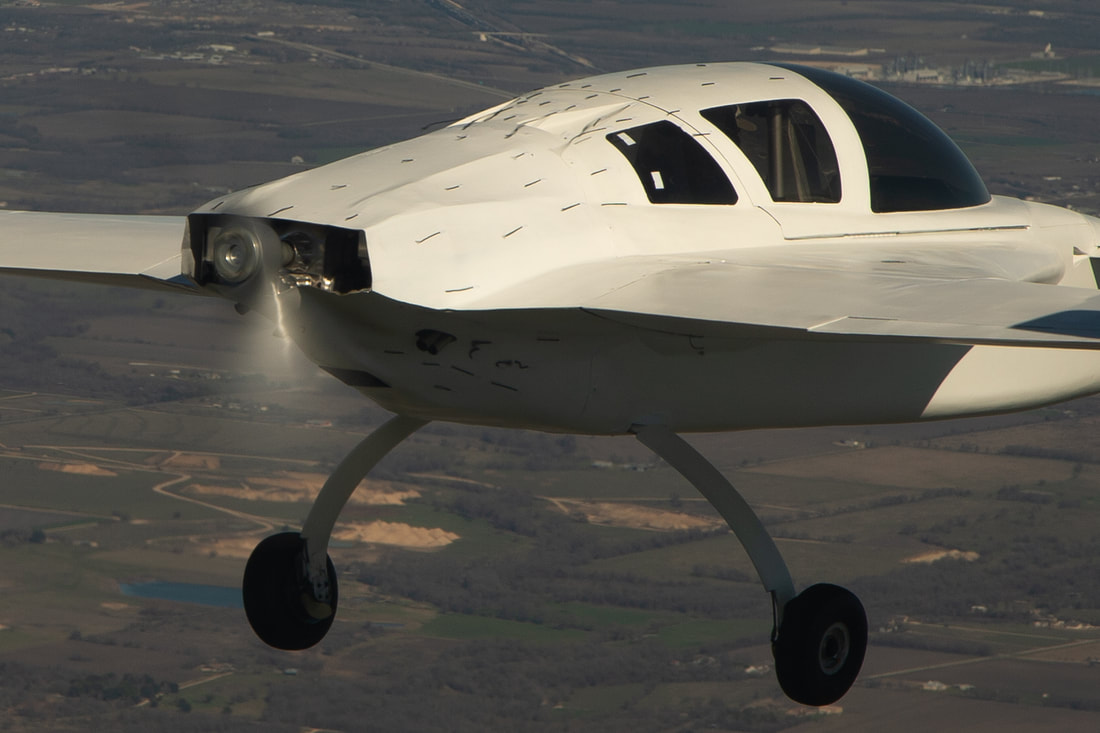
Flight test to record flow over upper NACA's and around the cowling and near the wing/winglet interface
approximate location of VG's before I installed them. Will get better picture here soon
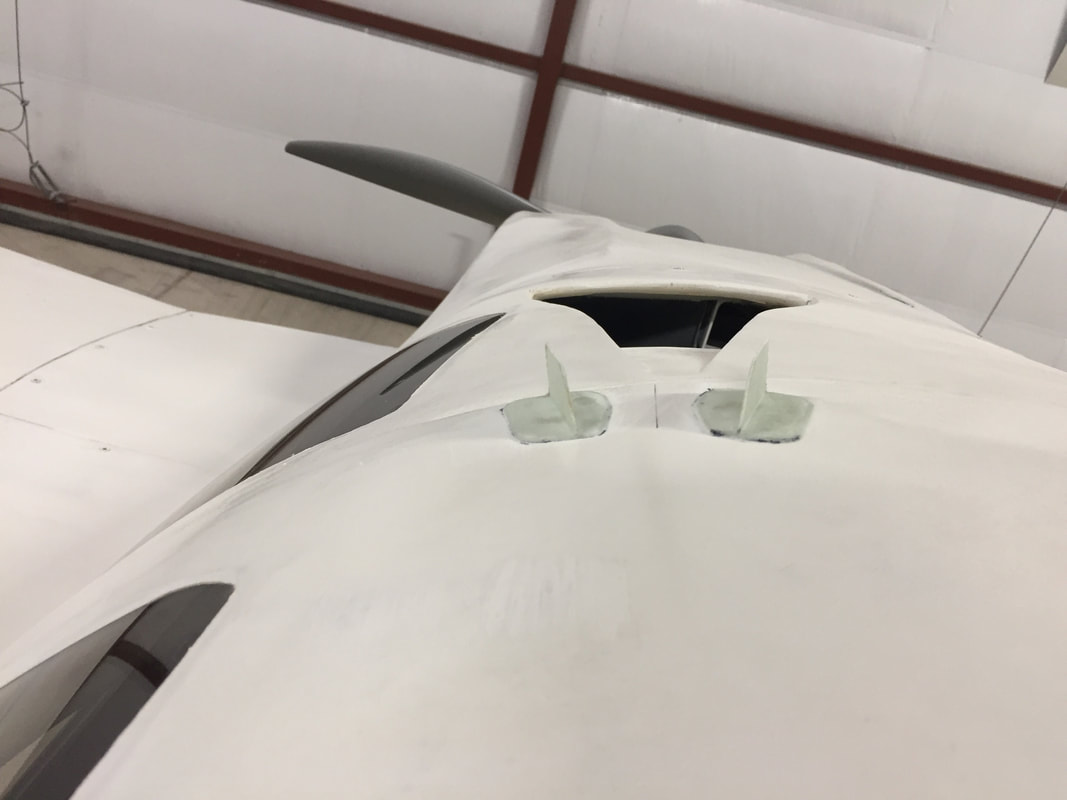
VG alignment is oriented not on the centerline of the NACA, but rather on the observed inlet flow angle from flight tests. The picture gives some distortion of the width relative to the width of the NACA (will need a better picture when I have a really tall ladder...)
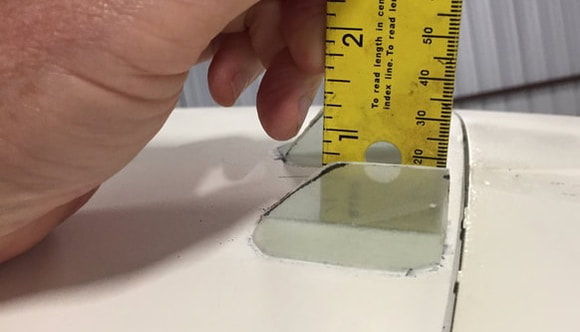
The VG's are only 3/4" tall.
|
|
Balancing Fuel Return Flow to Strake Tanks:
The fuel injection system of the UL 520is circulates fuel to the engine and only a small portion of it is actually consumed in each cycle. I'm not sure what the ratio of circulated fuel to consumed fuel is, and it certainly depends on the power level of the engine, but once I was flying I needed to balance this return rate so that my strake fuel tanks stayed roughly even. I want a passive system for this since I already have a fuel system that does not require tank switching as described here. So in the first few test flights of Phase I watched to see which tank was getting higher than the other, and it was consistently the pilot side or L tank. I then installed a ball valve in the return line on the pilot side to increase the flow resistance on that side so that it would roughly match that of the R side. I knew it would take a few flights to set/observe/reset this valve to get roughly even tanks, and I'm still in the process of making this adjustment after 2 flights, but I have bounded the setting needed. When I got the setting pretty close, I conducted a 1 hr ground test with the fuel pump circulating fuel to fine tune the valve setting, which was easier than flight testing, and I should have done first. Now will do more flight testing to verify that with the small amount of circulated fuel that's actually consumed, the valve setting is good. I later simplified the adjustment process of this return valve (see last paragraph below). I installed another one of these ball valves in the fuel line that connects the pilot side strake tank to the sump. This valve is normally OPEN but I can close it to fill one side tank at a time, which is done for electronic fuel level sensor calibration without handling 50 gallons of fuel. I've done a couple of test flights now where I only have fuel in this R tank and the L one is empty and the plane flies fine. In fact, it's a little more convenient to fly like this with less than 20 gallons of fuel, because it's really easy to see the fuel window on that side. I carry a mirror (tip from Rick Hall) for looking at the pilot side fuel window. After testing with just the R fuel tank I simplified the return to both sides fueling, by running ground testing with the engine off and the fuel pump running and observing the fuel levels as I adjusted the return valve. Each test is about 5 minutes and I use tape on the fuel level windows to make it easy to see an imbalance. I waited 4-5 minutes between tests to allow gravity leveling with the pump off before starting the next test. As the setting gets better, you run the pump longer to confirm. Takes me about 3-4 settings, then I run it at what I think is balanced for 1 hr to confirm. I watch the levels carefully on the next flight to confirm nothing changes with vibration and engine consuming some fuel. |
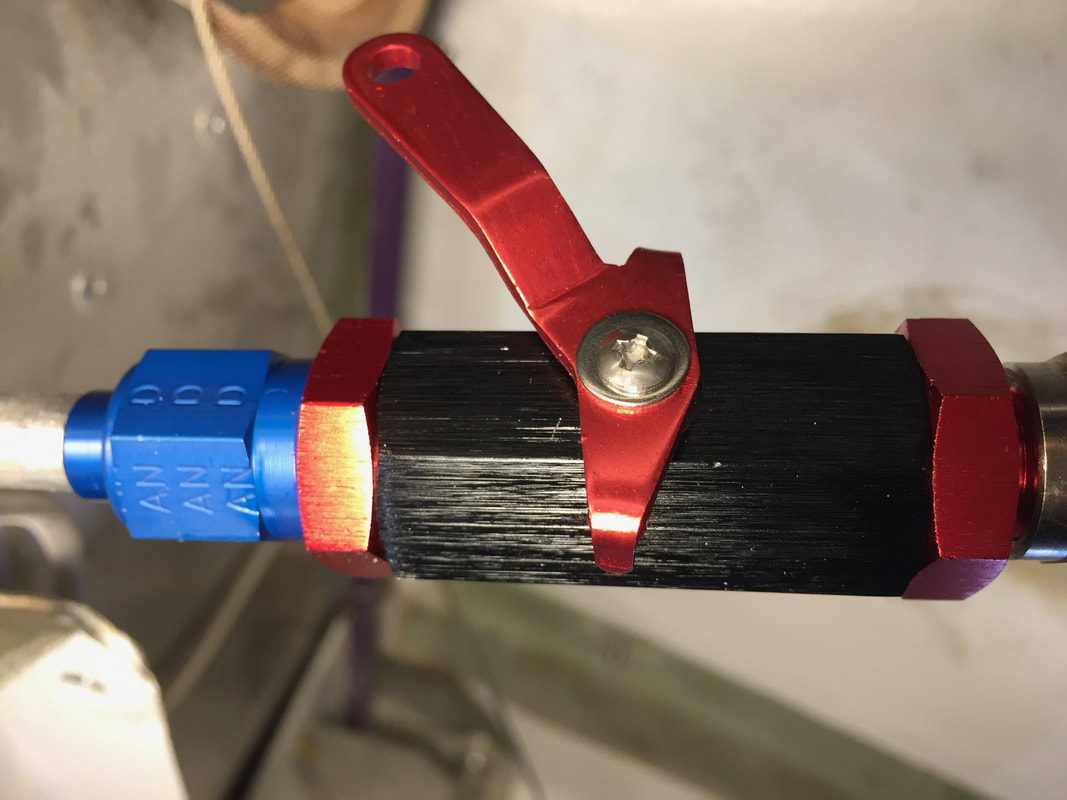
Ball valve on Pilot side fuel return to strake tank.
|
Main Wheel/Tire Alignment:
Back in Ch 9 Step 5 the main axles are aligned on the gear legs. I checked this alignment when I had the plane at the hangar pre flying and again after some taxi testing because I could see that there was significant camber and toe in in the lightly loaded conditions I hadn't loaded the Cozy yet for heavier Ph I testing. In getting ready to fit wheel pants and after about 60 landings I was noticing significant wear on the onboard edges of both main tires, and never was really happy with the amount of brake use I was doing in taxi conditions. After querying the group I got a recommendation from Marc Z to load the plane to most common flight condition and try and drive the camber and toe-in to zero for this condition. The process I used was to load it to solo flight condition (1400 lb GVW) and dual flight with baggage condition (1650 lb GVW) and measured the toe-in and camber. I then calculated the shimming needed to drive both to zero in the 1650 condition. I applied those shims (washers between the axle flange and the brake shield and re-assembled and measured again at the 1650 condition and got camber to ?? degrees and toe in to less than 0.3 degrees. The resulting handling on the ground was SO MUCH better. I recommend doing this once some taxi time is under one's belt to avoid the extra tire wear I incurred for waiting so long. Oh, and I switched the tires so the higher wear edge was on the inboard side, to add some life to them before I change to new tires.
Back in Ch 9 Step 5 the main axles are aligned on the gear legs. I checked this alignment when I had the plane at the hangar pre flying and again after some taxi testing because I could see that there was significant camber and toe in in the lightly loaded conditions I hadn't loaded the Cozy yet for heavier Ph I testing. In getting ready to fit wheel pants and after about 60 landings I was noticing significant wear on the onboard edges of both main tires, and never was really happy with the amount of brake use I was doing in taxi conditions. After querying the group I got a recommendation from Marc Z to load the plane to most common flight condition and try and drive the camber and toe-in to zero for this condition. The process I used was to load it to solo flight condition (1400 lb GVW) and dual flight with baggage condition (1650 lb GVW) and measured the toe-in and camber. I then calculated the shimming needed to drive both to zero in the 1650 condition. I applied those shims (washers between the axle flange and the brake shield and re-assembled and measured again at the 1650 condition and got camber to ?? degrees and toe in to less than 0.3 degrees. The resulting handling on the ground was SO MUCH better. I recommend doing this once some taxi time is under one's belt to avoid the extra tire wear I incurred for waiting so long. Oh, and I switched the tires so the higher wear edge was on the inboard side, to add some life to them before I change to new tires.
Wheel Fairings/Wheel Pants:
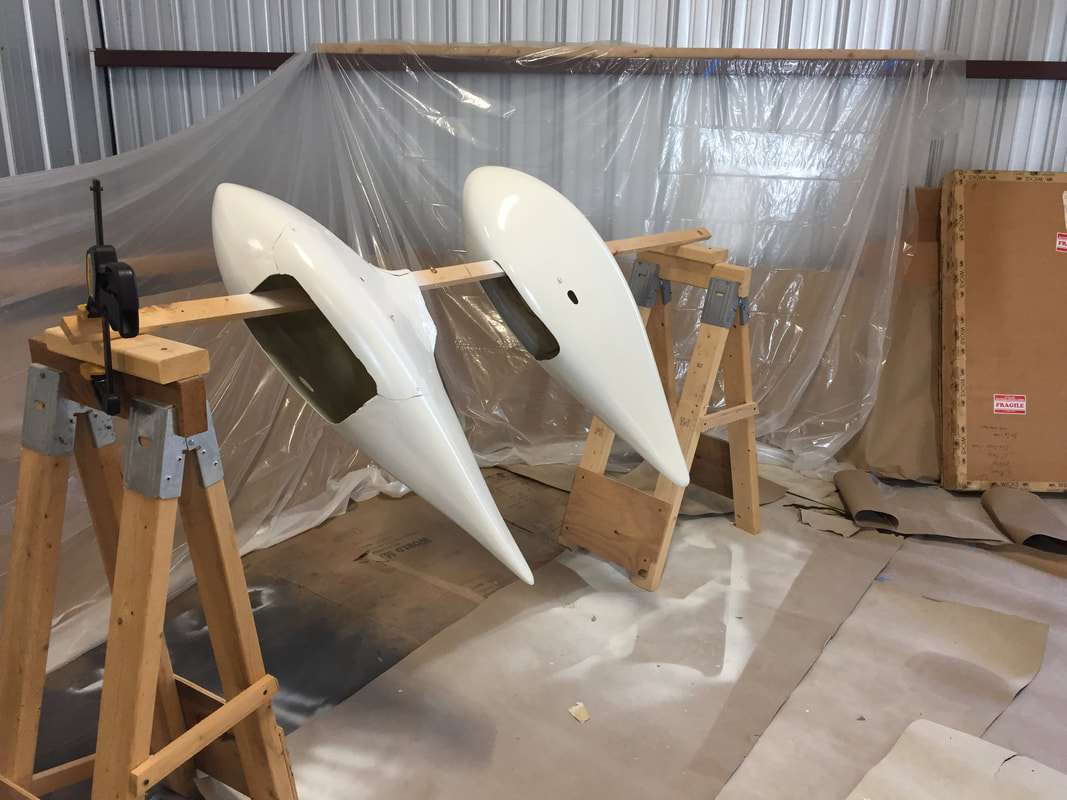
I didn't even order wheel fairings until I had completed First Flight and was into Phase I testing. I just didn't see a need to fit these up when I wouldn't be using them for most of Phase I. As I got closer to flight, I was really focusing only on what was absolutely needed for Phase I, and was happy to defer any non-flight-critical components. This got me in the air quicker and prevented me from even thinking about wheel fairings until I'd done most of the basic flight characterization and engine cooling modifications and was ready to make IMPROVEMENTS. I was really glad I waited. I ordered a set from Aerocomposites (took over from Featherlight) in CA, and waited a few months while they adjusted the design some to support quick removal of the fairing from the inboard section. Rick Hall had done this with his wheel fairings and I liked them. Even though they are specified for Cozy MKIV application, they still require custom forming in the fairing to bow area, and alignment, since the the molds are set up for Cozy III main gear bow angle and size. Here are some pics from the journey
I didn't even order wheel fairings until I had completed First Flight and was into Phase I testing. I just didn't see a need to fit these up when I wouldn't be using them for most of Phase I. As I got closer to flight, I was really focusing only on what was absolutely needed for Phase I, and was happy to defer any non-flight-critical components. This got me in the air quicker and prevented me from even thinking about wheel fairings until I'd done most of the basic flight characterization and engine cooling modifications and was ready to make IMPROVEMENTS. I was really glad I waited. I ordered a set from Aerocomposites (took over from Featherlight) in CA, and waited a few months while they adjusted the design some to support quick removal of the fairing from the inboard section. Rick Hall had done this with his wheel fairings and I liked them. Even though they are specified for Cozy MKIV application, they still require custom forming in the fairing to bow area, and alignment, since the the molds are set up for Cozy III main gear bow angle and size. Here are some pics from the journey
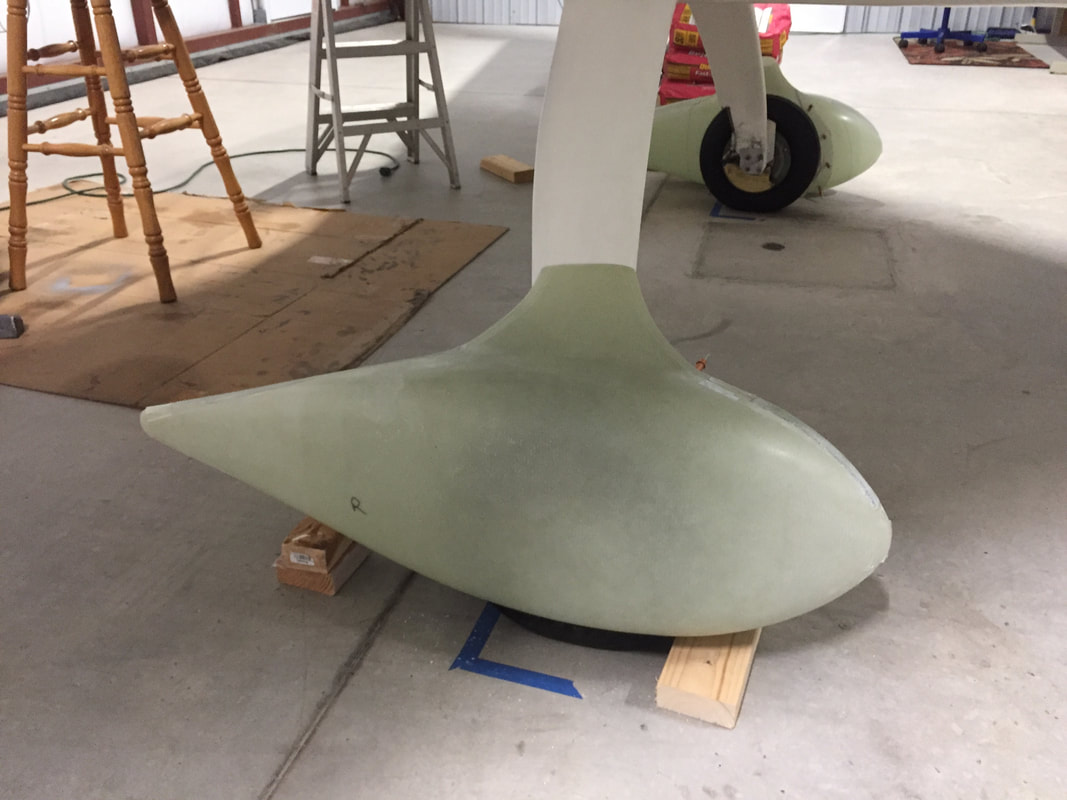
Cleco'd fairing OVER the wheel on R side. Needs a little more cutout in the bottom to allow raising the fairing slightly, and cutting out some foam in the inboard piece (tan foam in pic to the right) to enable more flush position against the gear leg.
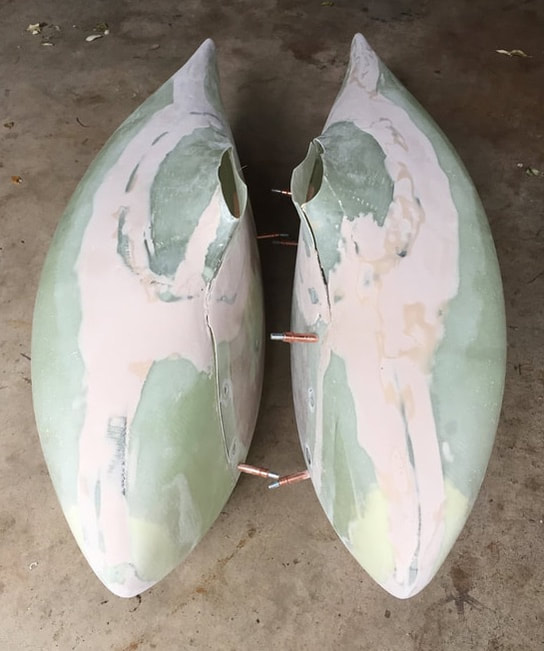
Starting the process of fill/smooth all the seams. Using West Epoxy 105/206 with West 410 filler.
|
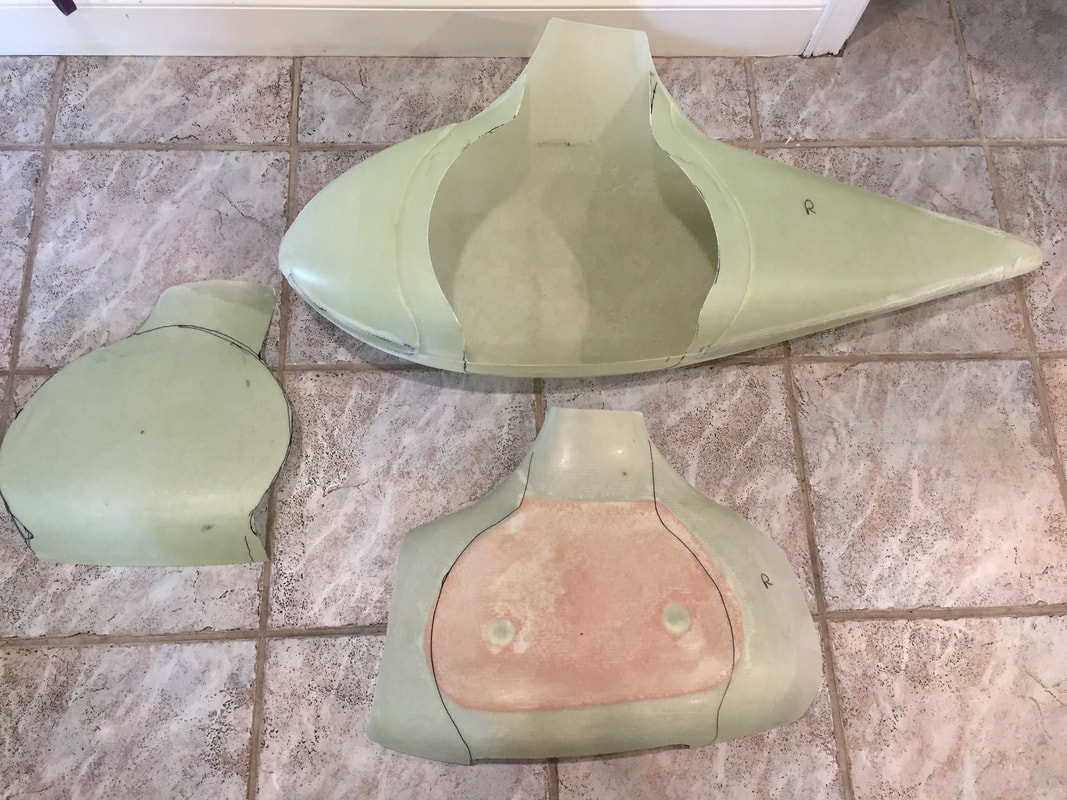
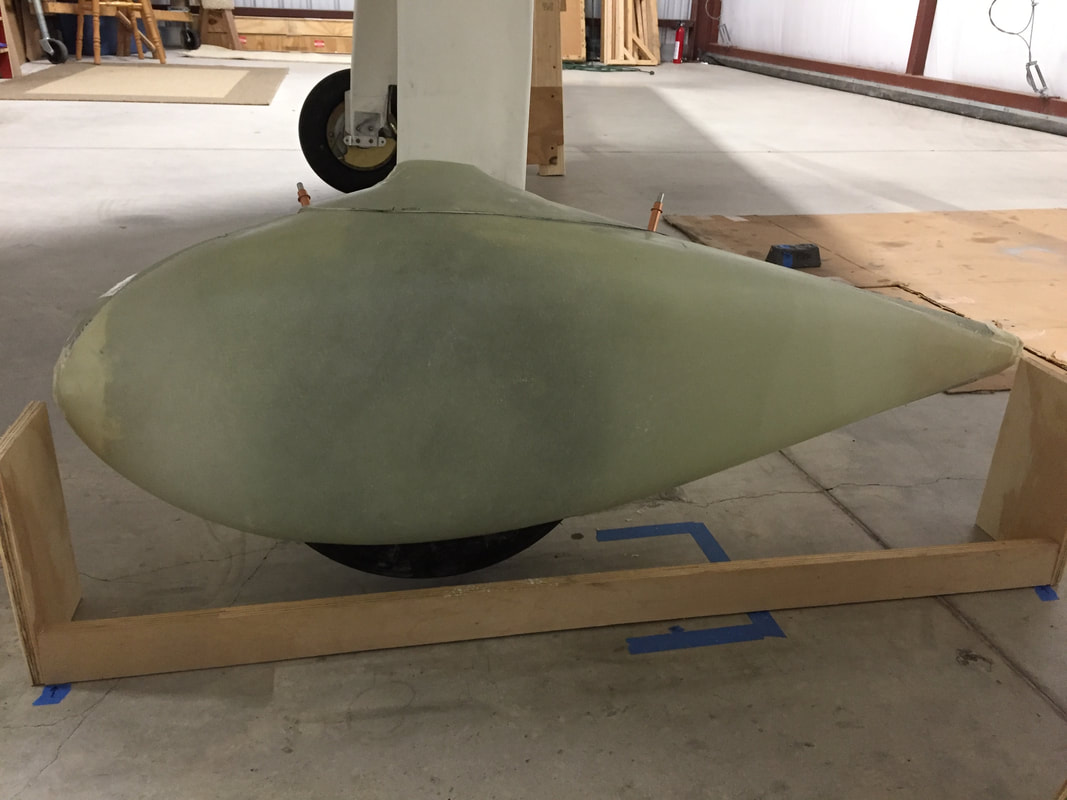
This is after I marked and cut out the clearance hole in the fairing shells, based on where I think the tire will be. I used the cutout on the left, to mark the inboard fairing piece that will mate with the fairing shell. This is where the inside flange will be on this piece, and I still need to mark, cut and fit the flange portion of this inboard piece that will overlap with the shell. More to follow...
Grazing pose wheel fairing clearance
Shooting primer...
|
Alignment jig touching nose and tail
Checking clearance in "grazing" pose
Clearance check at 11 degree's pitch up
|
|
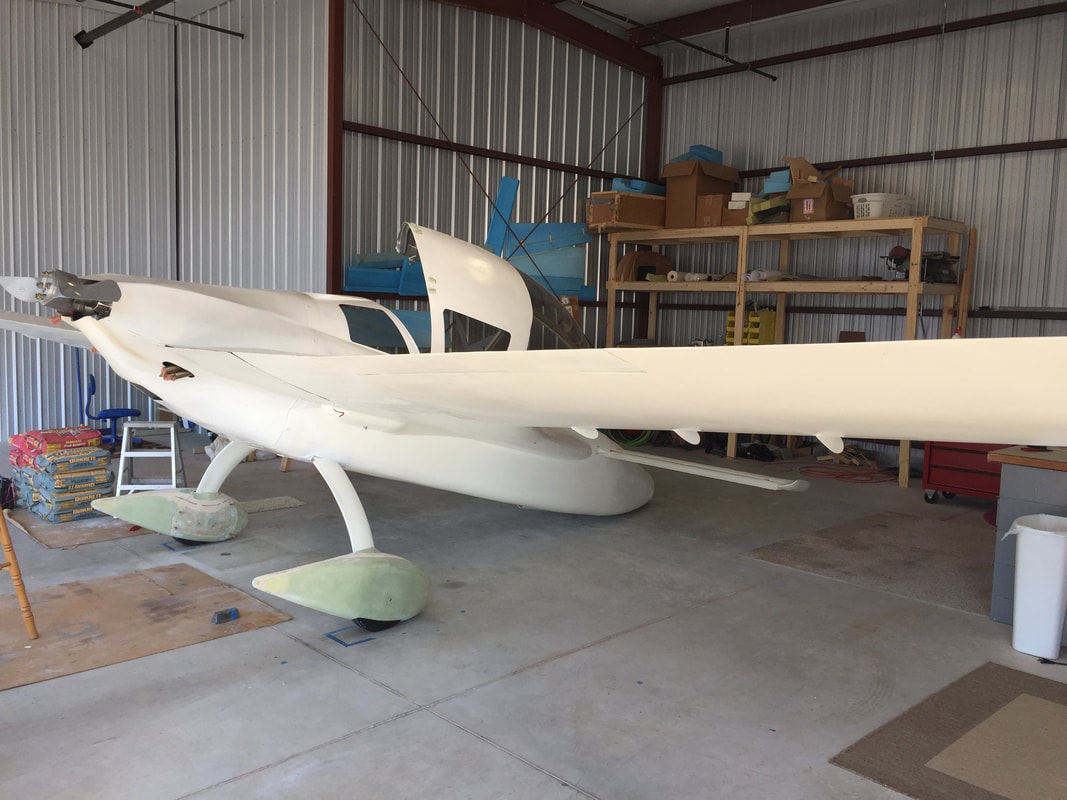
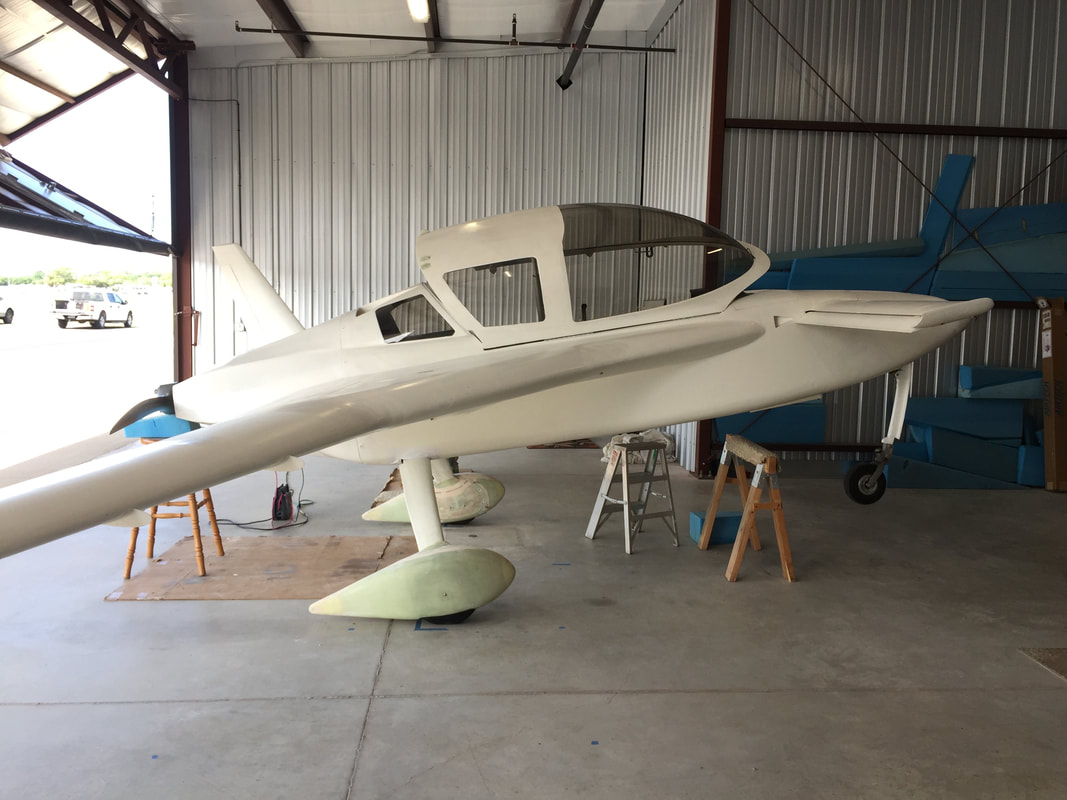
Attachment/alignment. This involved removing some foam on the inboard piece so that they fit and provide enough space on the outboard side for the tire. Also had to make a bracket that fit on the upper inboard axle bolts, and has anchor nuts for the inboard fairing to bolt to. After some alignment work, the outboard fairing can be appropriately mounted to an axle extension (also hast to be made). In it's final form, the fairing is attached in 3 places: The inboard bracket, the outboard axle extension, and a collar fit to the gear bow.
I test flew them pre-primer, then have flown them both light and medium weight and have no rubbing anywhere so far... The pants have a big impact on performance. I measured ~9 knots (Indicated and True) improvement in cruise speeds for the same engine RPM and density altitude. I'd been hoping for 5, which is the common result reported for Cozy's. |
Wheelpant configuration. Now I've got to fair in the gear/fuselage interface...
|
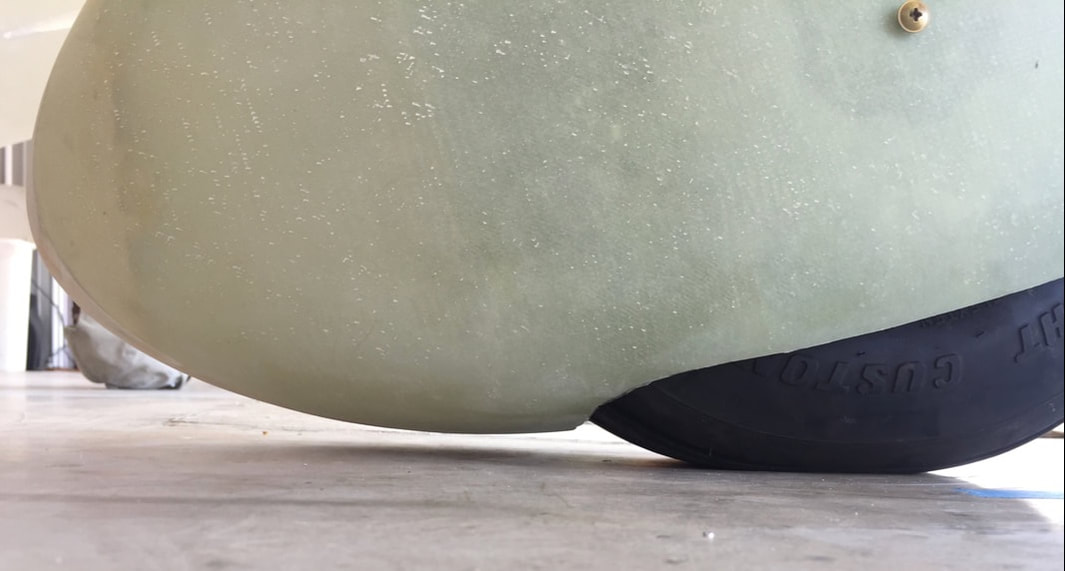
Fix to Wheel Fairing for New Slightly Larger Tire:
After I completed Ph I a new tire was needed on the R side and it's diameter when spinning fast was slightly larger than the original tires from the wheel fairing fitting described above. Here's a link for a little more on that story, but I've chosen to document the fix to the fairing here with the original fairing fabrication pics. Note that a few months later when the original nosewheel tire rotted from the inside and flatted, I fixed it and replaced the Pilot side main tire. When I did the pilot side switch to Goodyear it rubbed just like the Co-Pilot side and I performed the exact same procedure to put a clearance blister there as well. It's really not a big deal, and I can't imagine this tiny and very smooth blister makes any noticeable drag increase, and certainly is preferable from a drag standpoint to mounting the fairing higher on the strut.
After I completed Ph I a new tire was needed on the R side and it's diameter when spinning fast was slightly larger than the original tires from the wheel fairing fitting described above. Here's a link for a little more on that story, but I've chosen to document the fix to the fairing here with the original fairing fabrication pics. Note that a few months later when the original nosewheel tire rotted from the inside and flatted, I fixed it and replaced the Pilot side main tire. When I did the pilot side switch to Goodyear it rubbed just like the Co-Pilot side and I performed the exact same procedure to put a clearance blister there as well. It's really not a big deal, and I can't imagine this tiny and very smooth blister makes any noticeable drag increase, and certainly is preferable from a drag standpoint to mounting the fairing higher on the strut.
Autopilot:
I started installation of the autopilot servos while waiting to get my FAA inspections and completed this work about 1/2 way through my Phase I testing. The details of the servo placement are given part way down on this page.
I started installation of the autopilot servos while waiting to get my FAA inspections and completed this work about 1/2 way through my Phase I testing. The details of the servo placement are given part way down on this page.
Accelerated Stalls and Flutter Testing at Light Weight Mid CG: (1400lbs and CG 100.3")
This website is not intended to report all my Phase I flight results but will note a few key milestones. The first of these is examination of flight performance at fairly light weight (me + 20 gallons of fuel + nose ballast to put CG at 100.3 inches. The gross weight for this is ~1400 lbs.
Accelerated stalls were performed with varying degrees of bank and starting speed of 95kts. Elevator is pulled back until nose bobs. Key results: 15 degree bank -> stall at 67 KIAS 45 degree bank -> stall at 76-78 KIAS.
Flutter testing was conducted from 10,000 ft (DA 9900 ft) at speeds up to 210 KIAS with bump disturbance of Rudder L/R, Elevator U/D, and Aileraon R/L with no observed/felt vibration or humming. These tests required pitching the nose down as much as 20 degrees for the highest speeds, and pulling the throttle back to avoid over-speeding the engine. Neverthless, it was a great relief to have completed them and verified that there were no vibrational problems with the aircraft (particularly validating that the ailerons were balanced well!).