Special Cases - Interesting Fixes |
|
I've created this page to show some things that I tried that were outside the methods documented in the MKIV Plans. They were attempted later in my build, when I had significant experience (and had learned more about the behavior of the materials I was using). I place them here to avoid getting too distracted by the method description in the associated chapter pages elsewhere on this site, though the applicable page where it was used is referenced back to here.
|
Sealing and Re-Plugging the Center Fuel Sump:
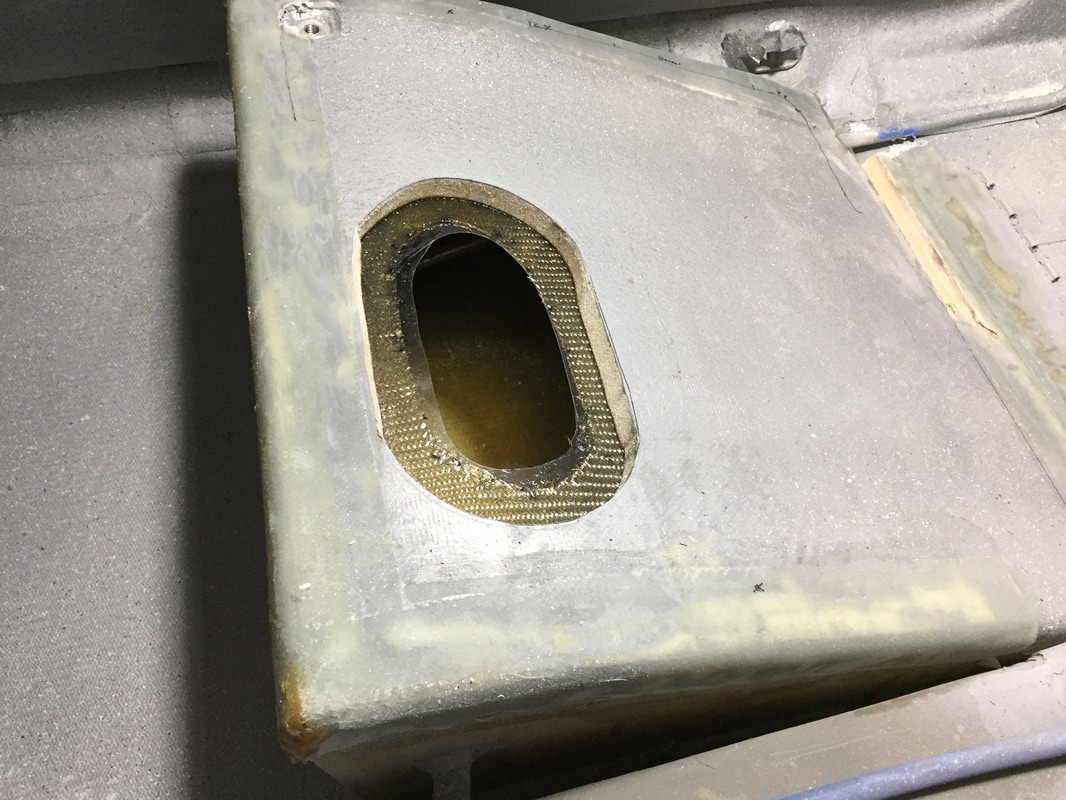
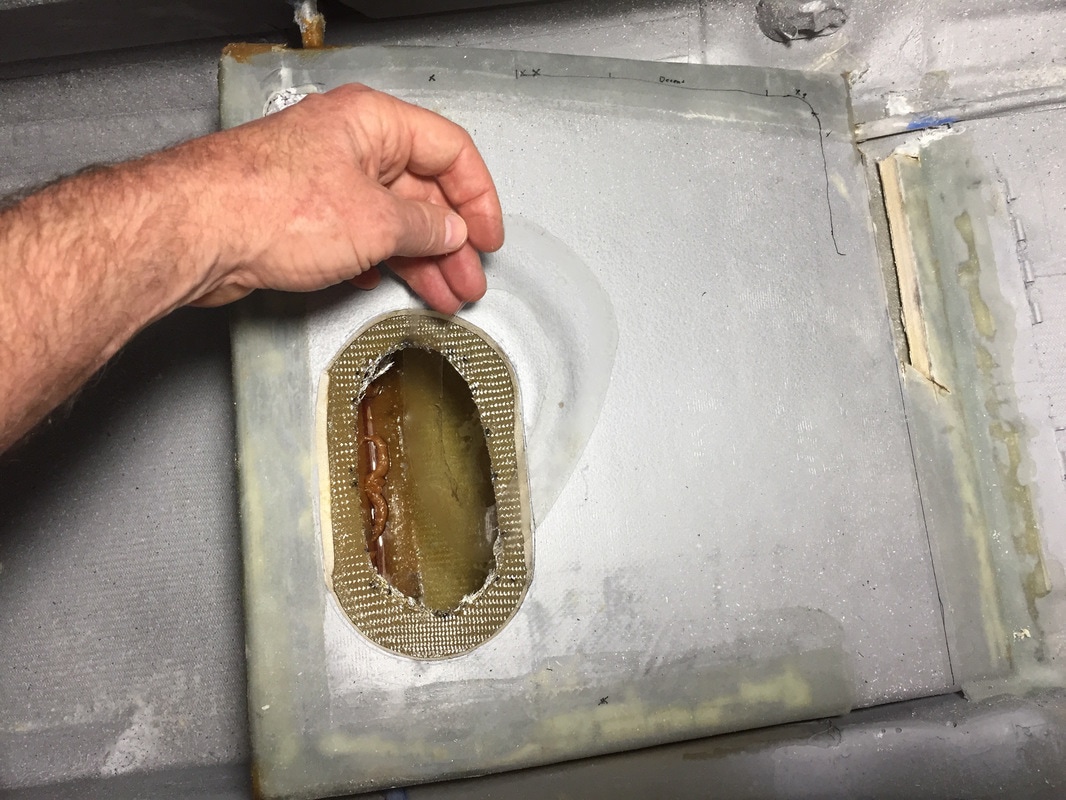
This was work related to finishing the fuel system after the strake fuel tanks were done, and relevant work is described near the bottom of the Strakes Part III page for Center Sump Sealing. All I want to cover here is the creation and re-sealing of an access hole I made in the lid of this tank (what was also the right rear thigh support). I was pretty nervous about this partly because it's always attention getting when you cut something you've worked hard to create, but even more in this case because it's associated with the fuel system, and the hole had to be pretty precise as I wanted to get a good strong seal and have a strong thigh support when done. These thigh supports get stepped on all the time and so they need to be strong. OK. Here's the process I followed with special notes in RED with associated rationale. I'd not seen these special note techniques documented elsewhere, but I may not be the first person to use them. 1) Cut the hole. I used a hand jig saw because I needed to do a curved shape. I made paper template holes working my way up until I found a circle size that was just big enough for me to get my arm through and rotate. I then stretched the circle with a short parallel section as shown in the figure and marked the lid where it would be cut. You must figure out what size hole you are going to do ONE time. since the "hole is going to be replaced in the repair and you don't want lots of cuts that form potential leak points. Take your time and prove that you have the right shape before cutting the real hole. Other constraints for my hole was it couldn't extend into the sealing flange from the sump sides and could not get within 1/2" of the reinforcing rib inside the sump, which you can't see in these photos (I knew where it was, but double checked old photos from when I built it). The hole is started with a 3/8" drill so I can get the jig saw blade in and then I just follow the line, BUT: I angled the parallel side cuts between the rounded ends. This is important so that the "hole" will fit well without trying to fall through later. I didn't have room to tilt the jig saw in the rounded edges, and I probably would not have been able to cut them well anyway with such an angle with the simple saw I borrowed from a neighbor. The angle I used was about 20 degree's from vertical and this saw only had a 45 degree fixed setting, so I angled it by feel. It worked out just fine since it's going back in just the way it's cut anyway. 2) Remove the "hole". Note that it won't fall in because of the angled cuts noted above. and do what ever work needs to be done inside the tank. 3. Pepare to close the hole: I'm going to build a firm 2 BID flange on the INSIDE of the access hole that will serve the same function as the T-hats: it provides a sealing surface for flox when the "hole" goes back in as a "plug". To do this I sand the inside surface all around the hole to at least 1" back from the hole perimeter. Then I cut the BID for the flange so it extends this 1" bigger than the hole perimeter and ~1" smaller than the hole perimeter. Now the special part: Cut plastic support ring, mine was clear plastic cut from a cover for a thick spiral bound report. I'll get a thickness measurement in here when I get a chance to measure it. This plastic is stiff enough to support the flange and yet still release after cure. It needs to stick to the wet BID well when actually doing the layup however. I made this piece extend 3/4" larger than the hole perimeter and 1.5" smaller than the hole perimeter. Then I pre-wetted all this together on the bench and brought it over to the sump to apply. 4. Apply the 2 BID flange: This is not trivial, but also not hard. Just relax and know that it's going to work. First wet the previously sanded area on the inside of the tank where the BID is going to stick! Then, guide the plastic/BID through the hole (it helped that the hole was not round in this case so I didn't have to bend the flange much), then rotate so it's well aligned with the hole. Your fingers are now on the inside of this flange supporting it from underneath. Now press the BID up against the previously wetted inside of the tank around the hole. Note that the whole thing will not stick and stay until you get all of it pressed together. The clear plastic is critical here. It provides support and something for the BID to cling to, in addition to the inside of the tank and together they form a capillary support for the wet BID. Now gently go around the inside of the flange and insure that it's well pressed all the way to the edges of the BID to the inside skin of the tank. Being careful not to push around on the plastic that's supporting the inner diameter/periphery of the wet flange. Then let cure. 5. Remove the plastic support: Once the BID has fully cured, you can peel the plastic support ring from it and bend it to get it out of the remaining smaller hole left by the BID flange. I wanted to do one last inspection of the interior of the tank with my fingers, and endoscope, so I lightly sanded the inside edges of the BID flange so it wouldn't cut my arm. You know have a nice firm flange to help seat the "plug" you cut out when you made the hole in the first place. 6. Flox in the plug: Just put flox on both the plug and the flange and press it in gently. Remember to fill all of the drilled starter hole. I did a little giggling of the plug once it's in to squeeze the flox a little until it comes up the sides, then wiped any excess off. Let cure. 7. Glass over the repair: This is already a really strong joint with the flox all around the periphery and the flange, but I put another BID on the outside for good measure. |
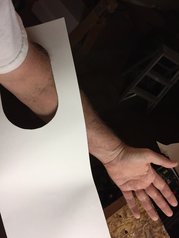
Using poster paper to prototype how small an access hole I can get my arm through and reach all corners of the tank
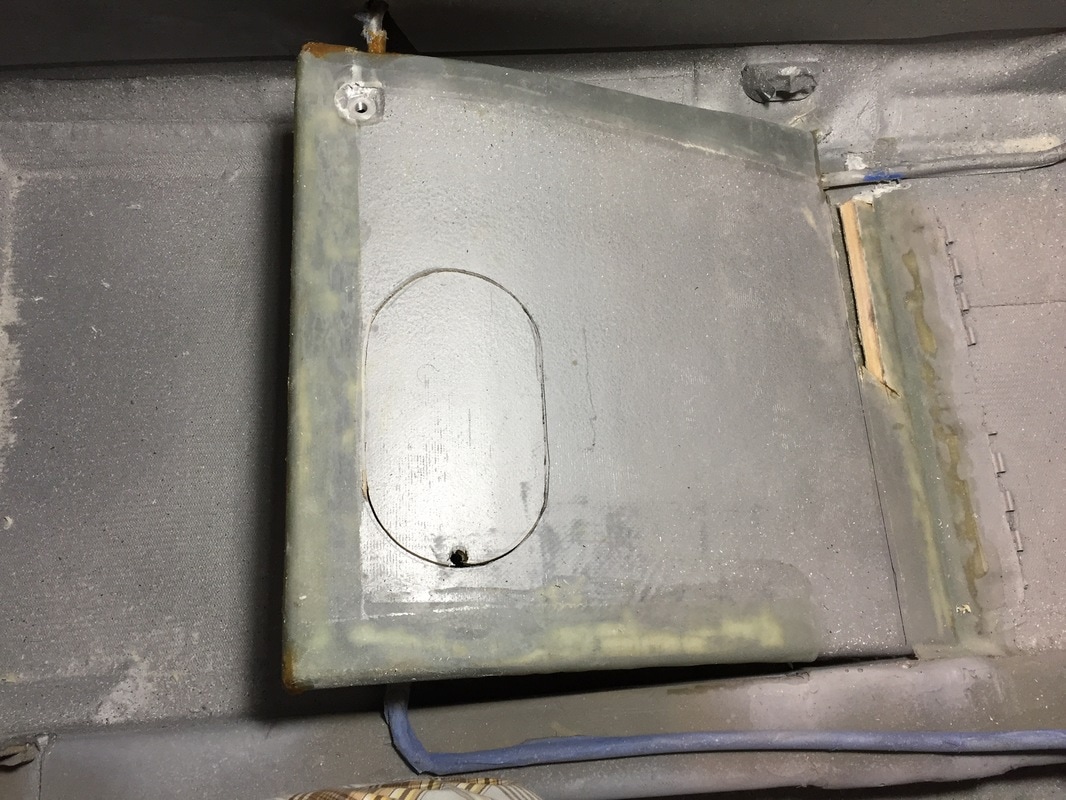
Pilot 3/8" drill hole then work your way around the marked perimeter

Angling the straight cuts so the plug doesn't fall through when done
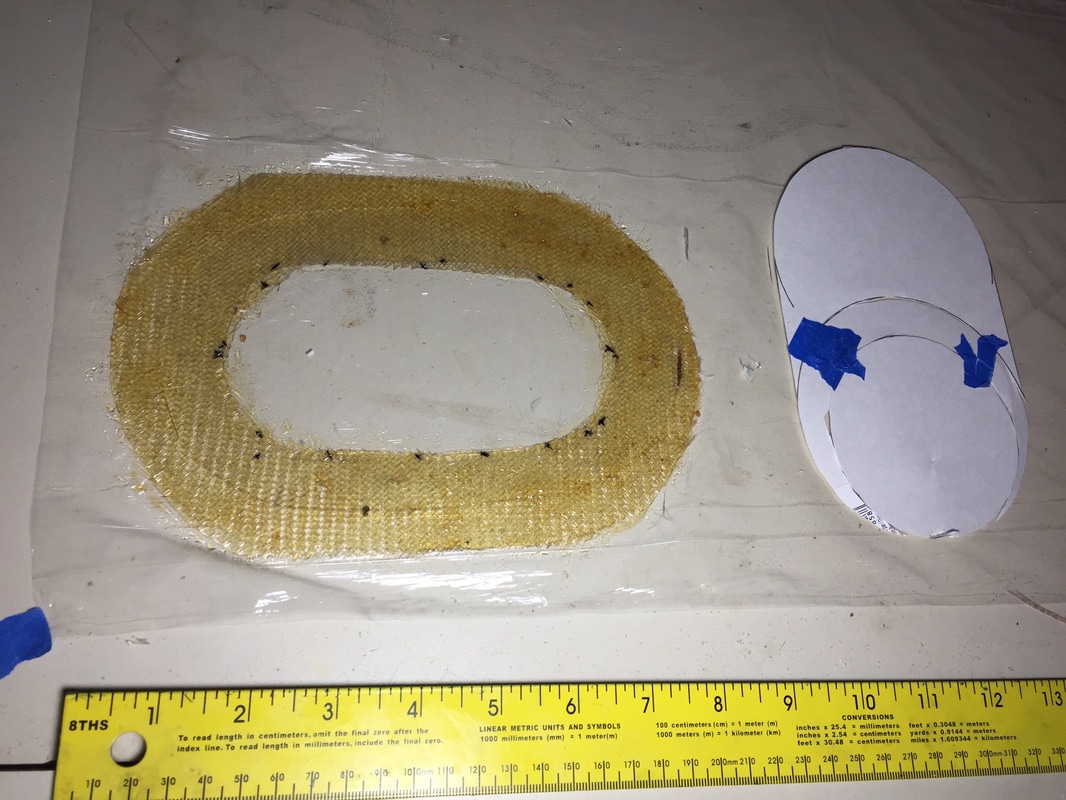
Pre-wet 2 BID and the plastic support (impossible to see in this picture. Paper "hole" used in first figure above used as glass and plastic sheet template with appropriate radial offsets in and out
The flange is set and curing. Had no videoographer to capture the handling of this, but it took about 4-5 min total to press it into place. Once it's set, leave it alone!
Removing the plastic support ring after flange has cured.
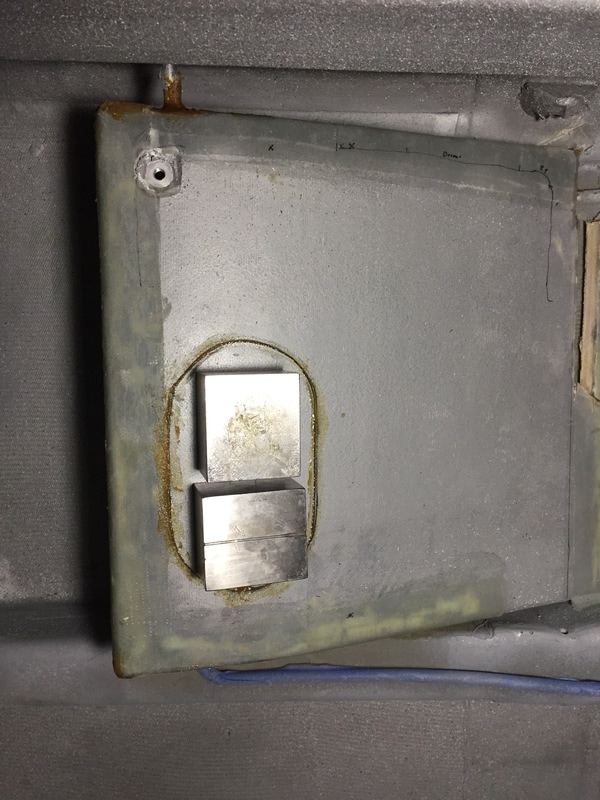
Floxing the Plug back in over the flange. You can use weight like this because the flange is strong and this helps insure good seal all around.
|
Vacuum bagging the Aelerons:
More on this when I get time. The problem I wanted to address, was getting the BID to lay nice against the several tight curvatures when closing off the leading edge of the ailerons. The method I used was a form of vacuum bagging.
More on this when I get time. The problem I wanted to address, was getting the BID to lay nice against the several tight curvatures when closing off the leading edge of the ailerons. The method I used was a form of vacuum bagging.