Chapter 22 Electrical: Warning Lights
|
There are warnings that can be generated in the Dynon HDX but I wanted to insure I had independent warning lights for a few of the most common things that can become issues if not corrected quickly in the Cozy. I planed for 3 warning lights just above the EFIS in real clear pilot view to handle: Canopy NOT locked, Nose Gear NOT down, and Landing Brake NOT fully retracted. However, I wanted these warning lights (red LED's) not to come on unless the conditions were such that they are likely a problem, so that normally the cockpit has no red lights. This required more logic and I decided to use an Arduino processor board to handle this logic as a non-flight critical function. ie if I had a problem with the Arduino system for some reason, it would not cause a problem, it's an AID.
So here's the logic I'm using: Canopy Latch warning: IF canopy not latched AND ECU switch is ON AND and throttle is greater than 30%. Thus the light should not come on when I'm working on the plane or taxiing, but as soon as I push throttle forward for takeoff, it will come on if not latched. Nose Gear warning: IF gear is not all the way down AND Altitude is greater than 5 ft and less than 400 ft. My assumption is that I'm not on the ground, but I am on final approach. This will light the landing gear warning after takeoff IF I start retracting the gear below 400 AGL. If this becomes a distraction, I'll add a condition where the throttle must be less than 40% to confine the warning to landing conditions. Note that I have a laser altimeter that Marc Zietlin uses for the same purpose in his auto warning extension for his landing gear. If at some point in the future I want to include auto extension, I can with this system as well but not doing that now. Landing Brake warning: If the landing brake is not fully retracted and the Throttle is greater than 40%. I assume here that I'm in a go-around configuration with landing brake down, but have just moved the throttle to full power and in this case, I need to slowly retract the brake to increase climb performance. I also have a fuel pump warning light that lets me know if inadvertently I've got both fuel pumps off with the engine ECU on. This should never really happen, but in an engine out condition, it would help me trouble shoot a bit. The light is down by the fuel pump switch, and the logic is simple: if the ECU is on and neither fuel pump is selected, then the light will come on. I started the development with an Arduino Nano on a breadboard and got some advice from Austin McElroy, who's worked with Arduino's on other projects. Jay Butera also helped me with some code optimization and simplification so it would run with a quick looping rate. I learned some things I could implement later for blinking the warning lights, but I think they will be plenty effective just turning on when there's a problem. The code was fully tested with the hardware on the bench top and has a setup routine that allows the pilot to go through and verify that all the LED's and the switches and analog sensors are working properly before it enters the automated monitoring and warning light logic implementation. Next was shifting from breadboard to a Nano PCB shield which is more robust to vibration and also incorporated some of the power conversion functions. I selected an Arduino shield board and am currently working on shifting everything over to it for further bench top testing prior to installation in the plane. Since I finished this in the hangar, here's where the last bit of pictures are. |
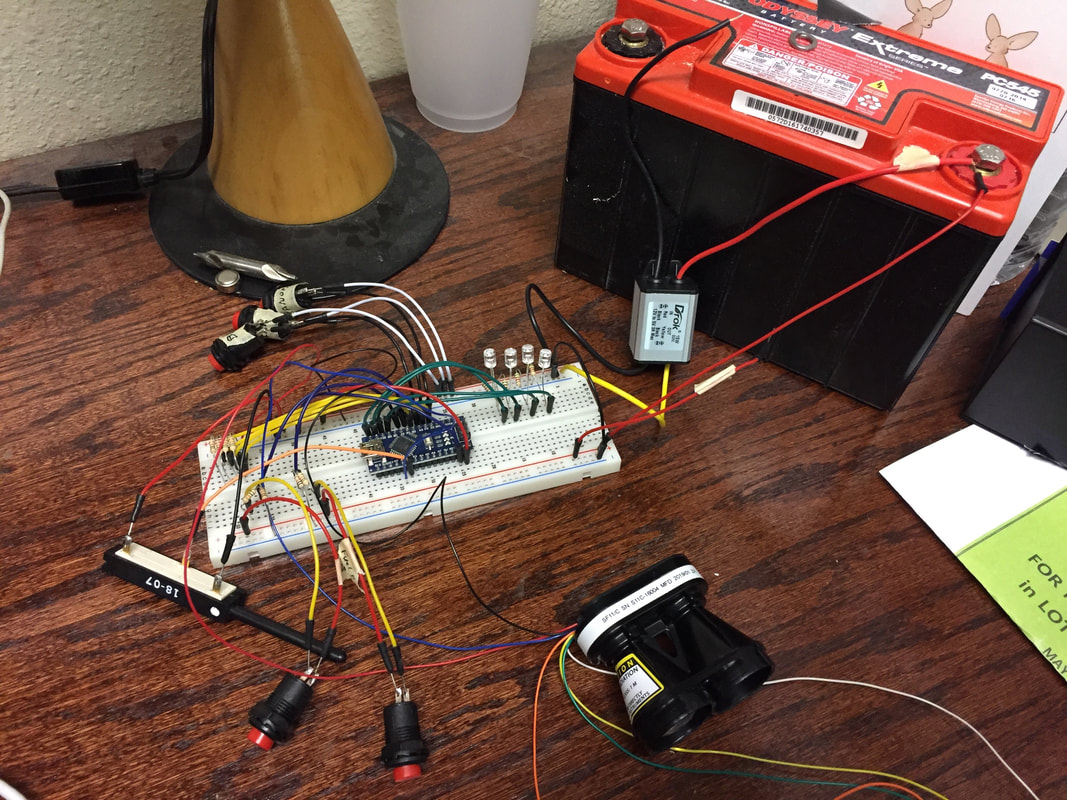
Early version of the bench top testing system with the Arduino Nano and breadboard. 12 V from the battery is converted to 5 V to power the Arduino and the altimeter and provide voltage to the linear potentiometer that's emulating the spare throttle potentiometer on the UL Engine. The black piece at the bottom right is the laser altimeter. 12V is also used to drive the ECU switch and Fuel Pump (3 position) switch just like it does on the aircraft. I'm using red button switches as stand-ins for the micro switches (upper side of breadboard) and the 12V switches (lower side of breadboard)
|